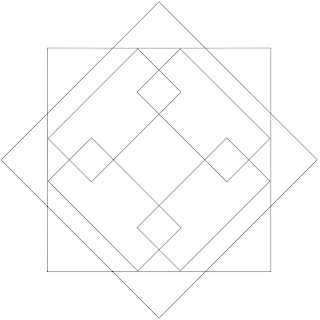
This past week's string challenge (I am running late) was shared by Sue Zanker, hosted by Tangle Patterns. I finished this up in the hotel, so really no editing is done or anything 'fancy' to this tile. Posted totally as is, photo shot with my phone. Tile displayed on standard hotel bedspread :). String challenge 030 coming up next!

 I am trying to work on some homework assignments for an online class I'm taking - getting further and further behind. (And it's only week two.) BUT - I want to post something every day - if I can. I started this last night. It's in my CZT field journal. I am trying to have a go at every official pattern. Some of the new patterns I tried here are meer, orlique, and cyme. Aura-leah and springkle are not official zentangle patterns, but I like them a lot!
Judy's Celtic Challenge to us last week was to have fun! She provided us the following template. I added a little paradox to the central portion and shaded with a copic marker. The simple lines of the zendala reminded me of a flower, so I turned sections into leaves and the remaining sections into petals.
And, yes, I am still running behind. Will I ever get caught up? I doubt it - hahaha! But I am trying! You can go here to check out all the beautiful celtic zendalas!
It is hard to believe it's been 24 weeks since Erin started the Zendala Dare. I participated in her first dare. It was my 3rd post on this new blog. Since then I have gotten fully immersed in this art style called zentangle, to the point that last month I trained and became a certified zentangle teacher. For jollies, here is the zendala I drew for that first challenge.
I have learned a lot since then, but I still kind of like this zendala. Haha! Wow! I've learned a lot about editing since then, too.
Back to week #24, this is the template Erin gave us to work with. I didn't really know what I would do with it, nothing was coming to mind. So, I just picked up a pen and started with that center square. Then I moved on to the main square and dreamed up some borders. I enjoyed trying out Helen's petal ribbon (a take-off of finery,) which you can see on her blog A Little Lime here. A really pretty and fun variation! From there, this tile just kind of took on a life of its own. Throw in some Pitt artist pens and Derwent Inktense Pencils, flick a little color around, and call it done.
Several people have asked how I take photos of my tiles for posting. My main problem is always finding even light. Look for a spot where you have the same amount of light across your tile - and background, if you use one. Be careful around windows because you will get some sunlight, some shadows, making your photo uneven.
Every photo on my blog has been taken with my iphone 4S, even though I have an excellent canon, the iphone just takes good pictures. I get as close as I need to so that the tile and a minimal amount of the background fill up the screen on my phone. I lean against my chair, lock my arms to my side, hold my breath, watch for the square on the phone that tells me the shot is in focus, and gently push the button. No snapping, no jerking, no punch the button to get it over. Gently, so your photo is sharp. Then I just email the photo to myself for editing. And that will be the subject of a different post.
Head on over to Erin's page The Bright Owl and check out all the incredible zendalas! You should really draw one of your own and post it for us to enjoy :).
What you see above is an unfinished tile. At this point you have one half of Rick's Paradox. I have tried this pattern on several occasions. When I drew on a small scale, I could get the pattern to work 'somewhat.' Not good results, just barely passable. When I traveled to Rhode Island last month to be trained to teach zentangle, this is one of the patterns the students asked for help with. This made me feel better knowing I wasn't the only one having problems with it.

So I made some notes in my CZT journal and some little line drawings with arrows to remind where the lines should begin and end. I finally had time two nights ago to try paradox out again. The first photo is what I drew the first night. I remembered that Rick and Maria both taught us to slow down with our strokes and to be deliberate with every stroke of the pen. So I really tried to do that and it worked! I like the first tile a lot! It is half of the pattern with the lines all starting at the lower left point and drawing them deliberately to the right. I did all 4 sections, then took a break. I didn't want to reverse the lines for the second half, alternating back and forth, because I knew it would confuse me and I wouldn't get the results I wanted.
Last night I completed the second half of the tile. If you look at the two above, you can locate the first tile's lines in the second. It is kind of hard for me to see that, I'm having some vision issues with differentiation in small details, but it's there. I just reversed my lines, where before I started on the left lower angle and drew my first line slightly upward and to the right, this time I started at the right lower angle and drew my first line upward and to the left. Rotation of the tile for every single line is a must. Why don't you try it out and let me know how you do?
(This is where there used to be a diagram of instructions for drawing paradox that I got from the Tangle Patterns website, but apparently as of October, 2012, the CZTs are no longer allowed to show official patterns online. So, if you want to know how to draw this tangle, you will need to go to Tangle Patterns to find it.)
Here are the steps for drawing paradox, borrowed from the official Zentangle page. You can find this pattern and so much more information about the art of zentangle in general at www.zentangle.com . You can also find a wide range of tangle patterns listed alphabetically at CZT Linda Farmer's page - Tangle Patterns. So, go. Have some fun! But watch out, zentangle is addictive!
I really like the way this looks. Just like it is now. But. It isn't finished. It isn't shaded. The other four sections aren't filled in. But. I really like the way this looks. Just like it is now. So, for today - this is what you get. Tomorrow? Hopefully a completed version. That would be assuming I don't mess it up o.O
***Special note *** the second edition of Featuring magazine about art journaling, mixed media, and more is open for pre-ordering. I have the first issue and am really impressed with the quality, the articles, the writing, the photos, you can't go wrong with Featuring! Pre-order your copy here. If you pre-order before September 21st you will be entered to win a recognition of your art on the back of the 3rd issue - thirty inchies will be given away. Your art (or mine :)) could be featured. But you have to hurry and pre-order now!
My zentangle training has come and gone. The past few days whirled past in a blur and then, all too soon, the workshop was over. (I need to do a post about Rhode Island - apart from the CZT process. The area where we stayed was interesting in its own rights!)
Rick and Maria started us out with some basic tangles. We were able to get our feet wet a bit before we jumped on some of the harder patterns. The one above is an interesting design - it's called Punzel. They told us why it was called this, but I couldn't hear them. I'm guessing it's because it looks like Rapunzel's braid. I could be totally wrong, too :).
(Short break while I try to kill the humongous wasp flying through my work room!)
Rick's Paradox. Not the cleanest drawing, but it's the best I've ever done with this pattern. I wondered how to get this look with paradox. Who knew it would be as simple as reversing the pattern and laying the sections side-by-side!
I mentioned here recently that I used betweed entirely too much. The top pattern in this photo is betweed, but I can tell you I have never had it look like this before. Wonderful! The fishy looking one below that is fengle. I had never tried this one before - not that I remember - and I love the way it turned out! You will notice some of the arms are filled with orbs, while some appear to be open in the middle. Rick was showing us some variations of fengle. I can't wait to play with this one some more!
And this one was my absolute favorite! Maria named this one marasu - for her sisters. I don't believe I had ever seen this one before. It was easy to draw and gave a real sense of accomplishment. The light running on top of the rounded portion was drawn in with a chalk pencil.
I have lots more to show you, but I think that's enough for today :).
(By the way, said wasp has been dispatched! It is once again safe here.)
 The Zendala Dare's challenge this week is to honor someone who has been touched by cancer - either still fighting, or someone who lost the battle. She gave us this template:
and asked us to keep that someone special in mind as we tangled this mandala.
The Zendala Dare's challenge this week is to honor someone who has been touched by cancer - either still fighting, or someone who lost the battle. She gave us this template:
and asked us to keep that someone special in mind as we tangled this mandala.
I thought about that one for a few minutes. In my circle of family and friends, my mom, dad, mother-in-law, nephew, an aunt, several uncles, a sweet photographer friend, several friends at church, even myself have all heard that doctor's diagnosis of cancer. I think the one that impacts me the most is my dad. He battled cancer for years, running tests every 3 months for 4-5 years. Dad died a little over six years ago - not from cancer, but from a heart issue. Of all the illnesses my parents went through, from Dad I received his cancer genes, and from my Mom - her diabetes.
This tile was fun to work on. In his healthy days, Dad loved being out on the water. Riding around in his boat, putting across the lake, throwing a line out for a fish, setting up a trout line, fishing for cod off the docks of Newfoundland, or casting a net for shrimp - it didn't matter as long as there was water. This tile just reminds me of water and boats and maybe some fishnets in the background.
Thanks for a fun challenge, Erin! Head on over to The Bright Owl and check out the Zendala Dare. It is not too late for you to post a zendala of your own - in honor of someone you love!
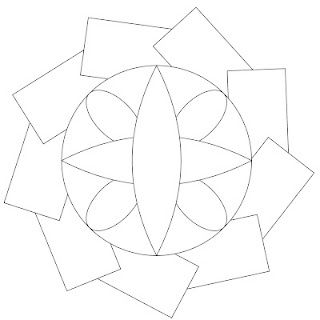
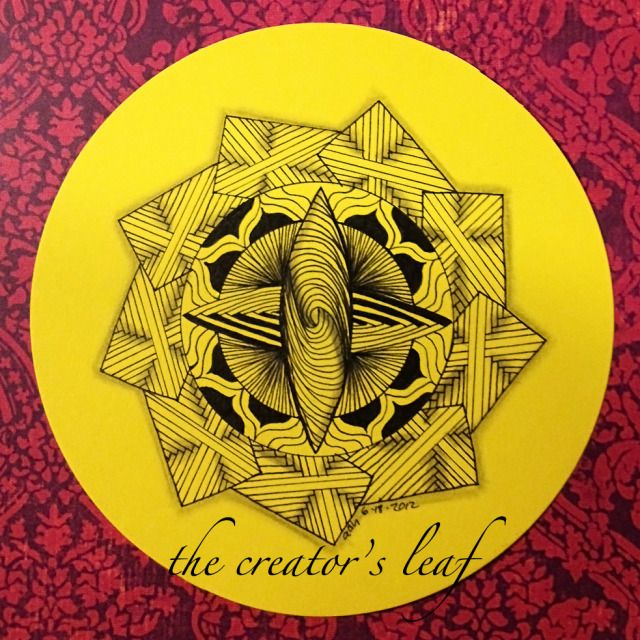 Erin at The Bright Owl is sponsoring Zendala Dare #10 this week. She gave us the blank you see below. Above, you see what I did with mine. I chose a yellow round tile and used the patterns paradox, weave, copada, hurry, and a variation of vortex. I'm calling the design in the middle 'paradox' - am I right? Or is this called something else?
 You can check out everyone's drawings at The Bright Owl. You can even try your hand it at and post one for me to look at! I will leave you a comment to let you know I've visited your page!
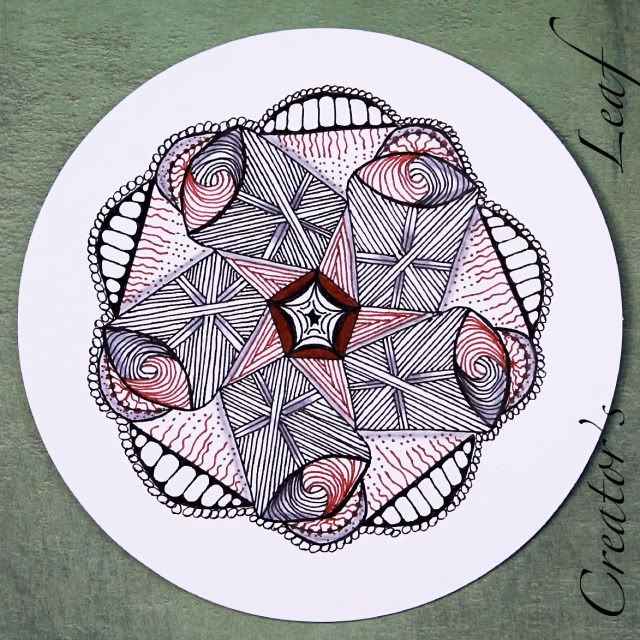 Over at the Bright Owl, Erin is hosting a Zendala Dare each week. She provides us with the template, which we then tangle and post to her blog.
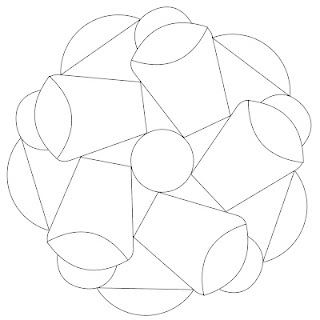 This is the template Erin gave us to work with this week. I started with the center and worked my way to the outer ring. Patterns I used were: crescent moon, weave, paradox, Msst, lokomotive, pearlz, and coral. This week's template really challenged me. It kept reminding me of McDonald's! and their french fries which I haven't had in months! Hungry!!! So, I decided the cups looked more like cups of hot chocolate! Which I can have - on occasion!
Check out Erin's blog here and see what everyone else has posted! Maybe you'd consider joining us in the Zendala Dare!