Showing posts with label At You Spica pens. Show all posts

Friday, August 22, 2014

Spill Ink on Your Project?

I have had a request for more tutorials here on The Creator's Leaf, but I have to tell this tutorial was not a planned one. This is a post of necessity.
Off and on for the past week I have been drawing - and adding to - this 8" x 8" tangle. A little here, a little there, as I had the time. Last night I was happy with where the drawing had arrived and pulled out my copics to start some coloring.
I was rolling along fairly well until this happened. Do you see it, just there? (I sound like Hermione to Ron, "you have dirt on your nose. Just there. Did you know?") My pinkish copic was working very well as I colored parts of those zingers, then all of a sudden a big blob of color popped right out and onto my paper. I had no chance to even react. The marker just spit that color right out onto my drawing I've been working on for a week. Needless to say I was not happy.
So not happy. I grabbed my blender and tried to salvage some of the area, this was the best I could get the blob reduced to. I was so not happy. I can't even tell you how not happy. I shut everything down for the night and went to sleep.
My original thought last night was to throw the whole project in the trash, thankfully I didn't do that. I've told my kids over the years something I learned from my dad - that typically nothing is broken so badly that it can't be fixed, or mended, or altered in a workable manner. So. I woke up this morning with the thought that  - shoot! I can totally camouflage that blob! So out came my trusty little circle template. I had circles spaced around the project already, I just decided to add another. If I  hadn't already had circles figured into the drawing, I could have certainly added them at this point. I just needed to figure out a way to salvage what I already had - by adding something else. Pulling out an existing element and making it work in this blobby area.
In my haste - and probably partially due to all the cold medicines I'm taking - I didn't even realize I drew right over the top of the zinger stem. I also drew into the leaf - which I did realize. Ugh. So I grabbed a small tip pen and drew hash lines along the edges of some of the leaves to camouflage the error. 
To cover up the line through the stem - I added lines to all the zinger stems. Not a big deal, an easy fix. Then I drew another circle to go around that pink blob.
Finished coloring the circle, added some hashlines to a few other leaves to balance the drawing out, and I had my pink blob repaired and good to go.
Then I finished up the coloring with some other copics, At You Spica glitter pens, and my Wink of Stella glitter markers. Love those pens!

So, if you need to cover up a blob of ink - or a portion of your drawing that didn't turn out like you expected - look for an element that is already present in your drawing. Perhaps you will find one that you can replicate in the problem area to camouflage/fix it. And have fun!

(The idea for this drawing came from artwork of my friend Marizaan Van Beek. Marizaan is a fellow CZT who lives in South Africa.)

Monday, March 3, 2014

Cue the Warthogs

Cue the warthogs and meerkats.
Ready the lions, zebras, and giraffes.
Prep the elephants and wildebeest,
cause it's the circle of life.
Hehehehehehe!

Circle of Life
lyrics by Tim Rice

From the day we arrive on the planet
And blinking, step into the sun,
There's more to see than can ever be seen
More to do than can ever be done.

There's far too much to take in here,
More to find than can ever be found,
But the sun rolling high
Through the sapphire sky
Keeps great and small on the endless round.

It's the Circle of Life
And it moves us all
Through despair and hope,
Through faith and love,
Till we find our place
On the path unwinding
In the Circle,
The Circle of Life.

It's the Circle of Life
And it moves us all
Through despair and hope,
Through faith and love,
Till we find our place
On the path unwinding,
In the Circle,
The Circle of Life.

A little more twinchie fun today, this time in circles. 

I used watercolor paper - Bristol Smooth from Stathmore - 
and Dylusions Ink Spray, Wink of Stella Glitter Pens,
and At You Spica Pens.


The Creator's Leaf

Sunday, March 2, 2014

More Underwater Twinchies, APR #95

Under the Sea
(continued from yesterday)
~ The Little Mermaid ~

Down here all the fish is happy
as off through the waves they roll.
The fish on the land ain't happy,
they sad 'cause they in their bowl.
But fish in the bowl is lucky,
they in for a worser fate.
One day when the boss get hungry
guess who's gon' be on the plate.

Under the sea,
under the sea,
nobody beat us,
fry us or eat us
in fricassee.
We what the land folks loves to cook.
Under the sea we off the hook.
We got no troubles,
life is the bubbles,
under the sea.
Since life is sweet here,
we got it beat here,
naturally.
Even the sturgeon an' the ray
they get the urge 'n' start to play.
We got the spirit,
you got to hear it,
under the sea!

(Kind of long, but here's the rest.)

The newt play the flute,
the carp play the harp,
the plaice play the bass,
and they soundin' sharp.
The bass play the brass,
the chub play the tub,
the fluke is the duke of soul.
(Yeah)
The ray he can play
the lings on the strings.
The trout rockin' out,
the blackfish she sings.
The smelt and the sprat
they know where it's at,
an' oh that blowfish blow.

Under the sea,
under the sea,
when the sardine
begin the beguine,
it's music to me.
What do they got? A lot of sand,
we got a hot crustacean band.
Each little clam here
know how to jam here
under the sea.
Each little snail here
know how to wail here.
That's why it's hotter
under the water.
Ya we in luck here,
down in the muck here
under the sea.
just add water silly's blog hop link

Going to add this post to the weekly Artist's Play Room challenge. Jenn encourages us to 'art' and share it in the play room. Why don't you head on over here and check it out.

*  *  *  *  *  *

Twinchies are tiny pieces of art that are two inches square. A whole bunch of artists on facebook are currently involved in a twinchie swap. I can not wait to start receiving beautiful pieces of art from all over the world - literally! These are just a few of the twinchies I will be sending out. More tomorrow.

These twinchies were made on watercolor Bristol smooth from Strathmore, color comes from Dylusions Ink Sprays, and sparklies are courtesy of Wink of Stella Glitter Markers and At You Spica Pens. Click on photo to see a larger view.
The Creator's Leaf

Saturday, March 1, 2014

Twinchies Under the Sea

Under the Sea
~ The Little Mermaid ~

The seaweed is always greener
in somebody else's lake.
You dream about going up there,
but that is a big mistake.
Just look at the world around you,
right here on the ocean floor.
Such wonderful things surround you.
What more is you lookin' for?

Under the sea,
Under the sea,
Darling, it's better
down where it's wetter,
take it from me.
Up on the shore they work all day.
Out in the sun they slave away,
while we devotin'
full time to floatin'
under the sea.

Twinchies are tiny pieces of art that are two inches square. A whole bunch of artists on facebook are currently involved in a twinchie swap. I can not wait to start receiving beautiful pieces of art from all over the world - literally! These are just a few of the twinchies I will be sending out. More tomorrow.

These twinchies were made on watercolor Bristol smooth from Strathmore, color comes from Dylusions Ink Sprays, and sparklies are courtesy of Wink of Stella Glitter Markers and At You Spica Pens. Click on photo to see a larger view.

The Creator's Leaf

Monday, January 20, 2014

Doing Better, APR #89

My foot is coming along. Finally. That old achilles tendon is finally starting to feel a bit better. Of course I've been sitting for a week and a half now. Reading, playing my gameboy, checking facebook, and drawing a little here and there.
About 40 heated foot soaks, 40+ ice packs, and one can of BioFreeze and I can tell some difference. Getting up in the morning and putting that foot on the floor is still a challenge. Talk about pain!
But I'm getting there. I go back to the doctor this Thursday to see where we go from here. She is looking for a 50% improvement. I think we have that much. Praying we have that much.
And in the meantime, I draw. And for the first time in quite awhile, I am linking this up to the Artist's Play Room where Jenn lets us post whatever art floats our boat this week. This is what has kept me afloat as I sit here on my chaise lounge with yet another ice pack. You can check out the Artist's Play Room here at Just Add Water, Silly! (I love Jenn!)
just add water silly's blog hop link

The Creator's Leaf

Friday, December 27, 2013

A New Year's Coming

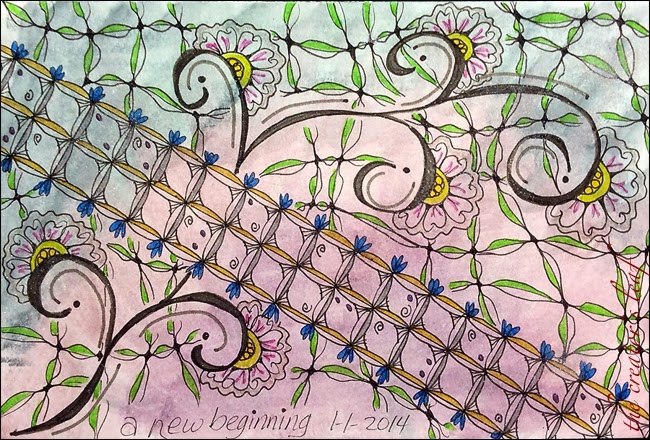
These are the last three of my New Year's post cards for the swap. I used mixed media paper and cut my own 4" x 6" postcards - rather than buying them. In the last two cards I tried something new. Not sure how I like it yet. I used pen nibs and a speedball wand, which I dipped into Liquitex Acrylic Ink to draw the pink string and the green vines. Other colors in the cards came from Grumbacher Translucent Watercolors, Wink of Stella Glitter Markers, and At You Spica pens. It's almost new year's day. The cards are in the mail. It's a new record :).
The Creator's Leaf

Friday, November 29, 2013

Butterfly Magic

Lately I have been working on backgrounds. Lots of backgrounds. They are such fun! This is what I'm working on today, the day after Thanksgiving. I passed up Black Friday shopping to stay home and make art. That's a good tradeoff anyday!
A few posts back, I showed you some backgrounds I'd been building. This is one of them. I started with an 11" x 14" sheet of Strathmore Bristol Smooth Surface paper and two colors of Dylusions Ink Sprays. This paper handles wet media very well. You get a little curling on the edges, which can be handled with painter's tape and a heat gun. Both of which I never remember. Anyway, this is what I started with today.
Next, I took this stencil from Joggles called Flight and placed it down on my background. I used a spritzer bottle of water and sprayed water onto the openings of the stencil.
Let that sit for about 15-20 seconds, then carefully lift off your stencil. Let the water sit on the surface another 15-20 seconds, then take a paper towel and blot the remaining wetness off the paper. You will notice the wetness lifted some of the color making those areas lighter. It won't work this way with all inks, I used Dylusions Ink Sprays and they work this way wonderfully.
A little blast from a heat gun with complete the drying process. Here is a close up of some of the butterflies. A totally different look for my background from what I started with.
Then I chose this butterfly to work with. 
Zentangle® is a really awesome art style that can be adapted to so many other types of art. I wanted to do something special with this butterfly. I started with the body and began drawing in some betweed. Perfect fit for a body.
From there I added a modified version of mooka for antennae, and started filling in a couple areas on the wings. Not any specific tangle pattern at this point, just filling in lines until I decided which direction to go in.
I went with a really loose version of Carole Ohl's tangle inapod, which I love. There are so many opportunities to use this pattern! And it works on wings!
And I kept adding patterns until I reached this point. You can see a bit more mooka at the top, then I used a version of Kathy Barringer's Up and Down, a little of Sandy Hunter's cruffle for the 'eyes' on the wings (I swear I'm obsessed with this tangle,) and finished with some auras and a little shading. I liked the butterfly at this point, but it still needed something. 
I was thinking it needed a little bling! A little sparkle! So I pulled out my At You Spica pens that come from Copic and got busy.
Sadly, I could not get my picture-taking-machine-AKAiphone to do justice to this color! The sparkly, shiny, glittery awesomeness that is the At You Spica pen is wonderful! Yellow, orange, red, pink (of course!), purple, and gold. So beautiful in real life. Not too shabby here. Now, on to the other butterflies before they all take flight and make a break for it. Unless they want some extra bling before they go :).

The Creator's Leaf

Tuesday, October 22, 2013

Ta-Da!!! All Done

In my last two posts I showed you some of the progress on this project. I used an 11" x 14" sheet of multi media paper and started tangling.
I worked on this off and on for several days. Probably more than several, I just haven't felt well and was dragging my feet. Anyway, I finished it up and needed to start cutting it down into ATCs for a swap I am participating in.
ATC stands for artist trading cards and you swap them with other artists. For this particular swap, we were supposed to only use black and brown ink - any kind, just those two colors. I chose black pitt pens and a couple shades of brown in the Tsukineko At You Spica pens which are loaded with sparkle and pop!
ATCs are 2/1/2" x 3 1/2", same as baseball trading cards. I took my larger sheet and cut it down into 15 ATCs. I am really happy with all of them. None of them were short on tangles, they all looked balanced and sparkly.
I preferred doing the project this way. It was quicker than drawing out 15 individual cards and I didn't have to think as much. And isn't that what zentangle is all about anyway? This was the first time I approached a swap this way and I was concerned about using my products economically. This was all the paper I had left over. I have figured out a different way to cut the cards so that I finish up with one extra ATC next time and less waste.
Here you can see all 15 ATCs. Pretty even coverage, something pretty to look at on each card, a balanced spread of black and white and sparkly. In fact, I like the way this turned out so much that I am going to do the next swap the same way! I hope you have a great week and that you get to tangle something really incredible and fun! Maybe some Christmas ATCs? Or Christmas cards? Just an idea to get you started :).

The Creator's Leaf

Thursday, October 10, 2013

Heading to Peru

Yes, that was a shameless post title to pull you right in. I wish I was heading to Peru. Seriously. This is a project I worked on while I was in Maryland. I just added some little last bits of color last night, some sparkly that you can't really see here. This name tangle is headed to Peru!
This little sweetie is Emeli. She is ten years old and lives in Peru with her mom and dad, a younger brother, and a new baby sister. Emeli is a Compassion International child. I support her with a small monthly fee that allows her to attend a Christian school, provides medical care, food, clean water, and also gives Emeli life-skills training. I write Emeli letters and she writes back to me. We talk about her family, about her school and what she is learning, we talk about God and the scripture, we talk about anything Emeli wants to talk about. We've had a couple letters focused solely on food. I've been sponsoring Emeli for a little over five years now and she's been such a blessing in my life! I wanted to make something special to send her. Hopefully she will be excited when she opens the package to find her name - with lots of pink and purples - cause those are her favorite colors! Heading for Peru later today!

The Creator's Leaf

Monday, July 30, 2012

String Whimsy

TanglePattern.com has given us another string for the week. This one comes from Yamit Fridman from Israel. I really love how people all over the globe are embracing zentangle. I talk quite a bit with a couple ladies from Holland, and I visit quite a few blogs written in dutch, so I have added a translate function to my blog. 


Anyway, back to this post, a couple nights ago I posted a watercolored tile I had made. Well, this is it, even though the shape has changed a little. I had a slight accident along the right-hand side (actually kind of major) so I chopped that side off and kept this part :). Here is the string we started with:
I finished up with what you see above. A little watercolor, a bit of BTL Joos, a whole bunch of circles, and finished off with some Spica pens. You can check it out at www.tanglepatterns.com.


A big thank you!!! to Vanessa at LBG Studio, who is being so wonderful in answering some questions I have about photos. Thank you, Vanessa! Please check out her awesome blog here :).