Showing posts with label mandala. Show all posts

Thursday, September 14, 2017

Mandala #2

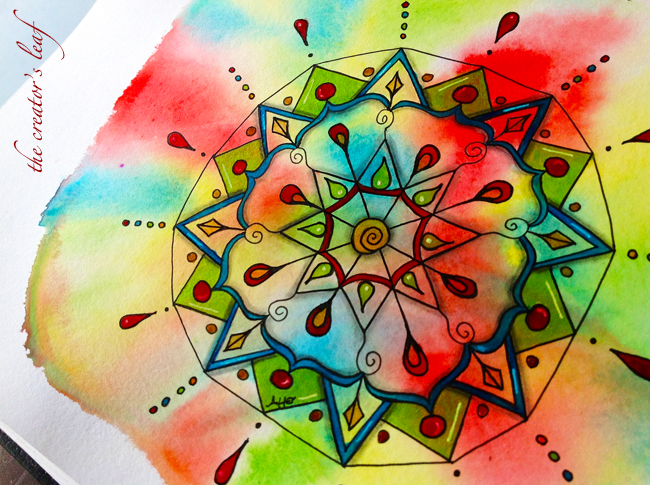
I really like the smoothness of the paper in this
Koala Tools' Circular Grid Sketchbook.
So much fun to work on at night while
watching Supergirl.
For the second time through.
Waiting for the release of season 3.
Hahaha!

Wednesday, September 13, 2017

Koala Tools Circular Grid Sketchbook


So I saw this new book on sale at the Dick Blick site,
and thought why not try it out!
The book comes with 60 pages of pre-drawn
circles for mandala art. 
Even though the ad says
60 pages, 120 surfaces -
it really only has 30 sheets. I counted it.
Twice.
30 sheets of paper
with the circle grids printed on both sides.
30 + 30 = 60
There you go, math geeks!

The Blick ad also stated that when I scanned
my piece of art, the teal lines would "become invisible when scanned."
So not true.
I am sure I can do that in photoshop if someone would
be so kind as to tell me how.
I tried everything I could think of. 
And although they offer this as a both-sides-of-the-page usable book, 
I would not suggest doing so. 
The places that I filled with solid black -
you can see bits of it on the reverse side of the page.
On the other hand, I really like drawing on this paper,
so smooth and the pens just glide across.
I used a copic multiliner, a bit of Sharpie fine point,
a white gel pen, and regular pencil and tort for
highlights.
It all worked great. 

The pre-printed circles mean even sections,
and working one or two rings at a time was
super simple. 

The paper is thin, so I am thinking wet media
or markers is not the way to go here.
Be prepared for standard black and white,
with colored pencils getting thrown in.

So, yes, I would recommend this book with the
understanding it really has 30 usable work surfaces
and won't stand up to wet media.


Saturday, September 24, 2016

Mandala Mashup

Mandala Mashup.
Basically you take four tiles and arrange them
as you see above.
Then you trace concentric circles
that cover all four tiles.

I started off with a couple empty medicine bottles, 
then a drinking glass, and a small plate.
You could use a compass but I have
never been good with those,
so I go simple with what is available.

Next I separated them into four tiles again.
I tangled them one at a time.
Tangle each one differently.
You will end up with four different 
little pieces of art.
When you put them back together
in this arrangement,
you have a mandala mashup.
I love it!

Perhaps you would love to give it a go.
If you don't have tiles,
just take a sheet of cardstock
(or white scrapbook paper)
and trace four squares the same size.
I used tiles that are 3.5" square.
Cut them out and follow the steps above.
Instant mandala mashup!

Friday, August 12, 2016

4 Tile Swapping

 One of the CZTs had a great idea to host a 
swap using four tiles,
drawing a mandala onto them,
then tangling each quadrant differently.
We mail our set to her and she will
match one of our pieces up with pieces from
three other people and mail us a set back.
Sounded like a really fun idea to me!
So here are my 4 tiles.
Here you see them unshaded.
At the top of the post you see what a 
difference shading makes. 
It's a pain sometimes but it is
always worth it!

I will be out of town for a couple days.
Expect more posts when I get back. 

Friday, October 23, 2015

Bringing Back the Free-Hand Mandala

We spent a wonderful week in Maine.
You will be getting inundated with photos in the next post. 
It's only fair to warn you. Hahahaha!
 We had no internet, so I wasn't able to post.
AND, I need to post a new challenge on my
Facebook Group - Zentangle All Around
so I decided to bring back the
Free-Hand Mandalas.
 Two years ago I wrote several posts about the art of the
Free-Hand Mandala.
You can find those posts here, here, and here
The first link will give the steps to making one of these awesome artworks.
The other two links will give you more ideas to create your own.
This week's challenge is simple.
Create your own free-hand mandala and post it.
You may do it without the color if that scares you.
Hahaha! Me? I live for color!

Also, I want to let you know about a new Facebook group
affiliated with out Tangle It! Journal series.
(We have just finished up our 4th week being 
the #1 Hot New Release on Amazon.
Whoot! Whoot!)
The new Facebook group is called:
Tangle It! Mandala Club.
I am going to go over there right now and 
post one of these free-hand style mandalas.
I hope to see one of yours there soon,
and on my Zentangle All Around page as well.
Have a great artsy weekend!


The Creator's Leaf

Tuesday, November 18, 2014

The Eyes Have It - Joey's #33 Tangle a Mandala

There's a cool blog that posts a weekly tangle challenge. Made By Joey has something for every level of tangler. I don't always get my artwork posted on Joey's blog but I always try to complete the challenge. This eye mandala was drawn for her 33rd weekly challenge. I got it finished after the next week was already posted and am just now getting around to linking it in.

This is a free-hand mandala that I worked on while I watched Merlin on Netflix. I don't know if that is where the 'eyes' came from or not. Morgana was being her usual creepy-deepy self, so it is entirely possible. Haha!

Also, I haven't shaded the mandala yet because I am hoping to add some spiffy color to it. But of course!

If you would like to check out Joey's weekly challenge just click on the pink link with her name at the start of this post. This week's challenge is to tangle something quilted. I am going to be all over this one!

Tuesday, October 7, 2014

Mandala-ish, APR #126

Here's another piece of art I worked on at Kali's - prior to moving her back south. Almost like a mandala, but missing the precision of a mandala. I started with that radiating spiral in the middle and just kept adding. 

It has taken me probably close to five minutes to find my chop - signature - in there. I try to always include it in every work I draw - or paint. Can you find it? My initials A and H, with a leaf - for the blog title: The Creator's Leaf.

I'm still trying to catch up here at home. So many things that need to be done and only so much energy. I'd rather sit in my chair and draw than clean house any day. Nothing new there. Ha!

Thanks to Debbie Nolan for following The Creator's Leaf this week! Welcome!

Linking up to Artist's Play Room this week. You can check it out here


The Creator's Leaf

Thursday, April 17, 2014

Mandalas With Margaret Bremner

Last week I attended a wonderful, fun-filled couple of days in Paradise! Paradise Beach in Florida that is, at the Retreat to Paradise. A fast-packed three days learning new techniques with some fellow tanglers - what an awesome time we had! This was the retreat's second year being held, and I'm fortunate to say it was my second year being there. 

We had some real heavy-hitters for instructors! Margaret Bremner has long been my go-to artist when I look at mandalas and whoot! whoot! Margaret was one of our instructors! I can't even begin to tell you how excited I was to be in her class and learn from her. Over the next couple posts I will be able to show you a bit more of what I learned, but for today I wanted to share our first project. This one was a bit more structured than the other mandalas Margaret taught. As a retired homeschool mom I fully understand that different people learn in different ways. One of the things I enjoyed about Margaret's teaching was that she taught to different learning perspectives. She walked us through this project step by step. Draw this, do this, make this happen here. As I post the other two projects, you will see that the teaching direction took different forms, allowing us to take what we learned in making this mandala and make the other two with less direction. Pretty awesome stuff! 

In building the above mandala, I learned a new tangle. One I don't think I've ever seen before. It's called crossview and it comprises that center focal point. Crossview was designed by Daniele O'Brien, CZT, and it was a lot of fun to draw! I love how dimensional the shading makes it! You should go to Daniele's blog link in pink just right up there and give it a go yourself! Now to finish up those other mandalas and get them posted!


The Creator's Leaf

Friday, August 30, 2013

Shining Up Those Reds

Yesterday I posted a tutorial on free-hand mandalas. Halfway through I realized I had not taken some critical photos, so I stopped everything and made the above background.
It looked just like the picture above - without the mandala drawn on it :). Then I went back and finished the post with photos of the other mandala. So, today I picked this back up and completed the project. With just a few simple lines and strokes, we have the basis of a new mandala.
The background colors were made with a Koi Water Colors Pocket Field Sketch Box from Sakura. Once I finished drawing the mandala, I used my twinkling H2Os to add the design color.
The H2O colors I used are: majestic blue, sky blue, key lime, poppy red, persimmon, mango mamba, pearl green, pearl red, Egyptian gold, and autumn butternut.
Can you see some of the shine starting to show? It's really hard to photograph and capture the essence of the twinks. I love these colors so much!
There's that ring around the edge where I tipped the sketchbook and let the water colors run and spread. Love it when that works!
To finish my mandala, I used a white gelly roll pen for highlights, and a pencil and tortillion for shading.
Voila! Finished project that includes red, a color I don't like and swore at copic training that I would never use again. Haha! I actually like it here! I hope you are able to try a free-hand mandala. They are so much fun and you never know what it is going to look like until you are finished. 

The Creator's Leaf

Thursday, August 29, 2013

Free Handing a Mandala

Let me start by saying this, I am taking a class from Dion Dior, learning how to use Twinking H2O paints. Dion uses the free hand mandala in one of the early lessons. Dion makes her living from art classes she teaches online, and it would not be fair to her to share class information here with you. So, what I did was check out youtube and watched a couple free hand mandala videos. That information is what I am sharing today. The finished mandala above is maybe the fourth or fifth one I've drawn.  I still get stumped trying to figure out which little line or squiggle to make next, so I started a chart in my notebook with little sample lines and squiggles. When I get stuck, I can look at my notebook.
I would consider color a vital part of a mandala. (Of course, I am all about color, so that doesn't necessarily mean a whole lot, haha!) When I do use color, I like to lay the color down first. Sometimes it makes a difference in the design I draw. For this particular one, I used simple watercolor pans from the school supply section at WalMart. Yes, I am still at my daughter's and my art supplies are in Florida. 
Well, this stinks. Right here I realized I didn't take any pictures of what I am about to describe. So, I stopped and made a new background for you. For this one I used my Koi Water Colors Field Sketch Box. Use some good heavy paper that can handle water. I am using my Stillman & Birn Zeta Series Sketchbook. It handles water and color manipulation great! I used a large paintbrush (3/4" wide) and coated the page liberally with water. Then I took my watercolors and with that same large paintbrush I dabbed down color here and there. You can stroke, you can dab, you can splatter, whatever you prefer. Just get 2-3-4 colors that work well together onto the wet paper. Then sit back a minute and watch the magic begin.
This is an excellent example showing how the colors will feather and bleed when you have the right amount of wetness present. Let them spread and mix.
I used four colors - I can honestly say I've never used red before. Like ever. Not a fan of red. This little Koi kit doesn't have pink or purple or teal. I'm sure I could take some time and mix them up, but I just went ahead with these colors. If you aren't getting enough mixing and feathering, spritz a little more water over the top and wait a few seconds.
Then, to mix things up even more, tilt your paper to one side and let the colors run. Watch out that they don't get muddy on you. If that starts to happen, tilt your paper in another direction. I do this with my whole sketchbook.
Once your get some results you can live with, stop. I love that water line around the left and bottom edge where the colors all ran together. But I thought it was a little heavy, so I lightly touched it with the corner of a paper towel and wicked off a tiny bit of the water.
There were a couple areas where I had pooled water that I didn't want to turn into mud, so I lightly dipped the edge of a paper towel along the wet places and wicked up some color. I like the white lines it laid down, giving some new texture to the background. This doesn't always happen, but it did this time and I like it.
 Completed background. I just left it sitting on the table to dry. Make sure it is completely dry before you move on.
Pretend this is a picture of my beautiful background. (Because I did this backwards, although it still works.) Begin drawing your mandala. Start in the center with a dot, or a circle, or a spiral - something to pinpoint your center from which you will build your mandala. To help keep your mandala on track, make small pencil dots towards the edge of your paper to mark the center point on each side - top, bottom, left, and right. This gives you a direction to draw your designs towards, to keep everything straight, so to speak.
From your central point, draw four lines of equal length as you see above.
 Then draw four more adjacent lines. These lines can be any length you want. They can all be the same size, or the main lines can be longer, or the adjacent lines can be longer. I've done this both ways, but you really need your main lines to be one length, and your adjacent lines to be one length. Now back to my planned mandala.
 From those eight central lines, start laying in some patterns. Some designs, some swirls, some triangles, some brackets, some circles, triangles. Anything works, just remember what you draw on one line, draw it on the other like lines. Main lines all get the same design, adjacent lines all get their design. Sometimes you will use that one design on all eight lines, like I did above using betweed inside all eight lines, and the pink brackets connecting all the lines.
Keep drawing, and adding, until you feel like your mandala is complete. Then, if you want to add more color - feel free. This one has been completed with twinking H2Os, but I also like using At You Spica pens from Too Marker Products, which I believe is part of Tsukineko.
If you notice that your color has covered up some of your black ink lines (see three photos above), you can simply go over the lines with more black ink. Then finish up your mandala like you would any tile you may draw. Some highlights and some shading.
I know this was a long post, I really need to learn how to do video, but you can see that the steps really are very simple. Like I said, the hardest part for me is deciding what little lines and squiggles to draw. Why don't you give it a shot? It's really so much fun! For now, I think I'll go work on that red one I whipped up in the middle of this post :).
The Creator's Leaf

Wednesday, August 28, 2013

Just Enjoying the Day

I am just relaxing here in Maryland while Kali slaves away at work and at school. Hahaha! Seriously, I am. And she is. Working hard. Her. Not me. 
Kali is in a really busy part of life right now, learning and studying and working and doing homework and working some more and going to more classes and . . . well, you get the picture. Her life is a little overwhelming at this point. Mark and I were concerned about her taking care of herself during this particularly trying time, so I am visiting to make sure everything gets done - like eating, and sleeping. You know - important things like not getting sick. Cause 'ain't nobody got time for that!
While Kali's at school or work, I am drawing. A lot. And having fun. I have been able to get back involved in Dion Dior's Mastering Twinks series of classes and combined some of my new knowledge with the postcard swap. I know people have said this at least a thousand times, but I really do wish the cameras could pick up all the shine and glimmer these beautiful little pots of Twinkling H2Os bring to the palette. Such gorgeousness at my fingertips. I love it! This little postcard is winging its way to my friend Donna Hornsby, who I hope to maybe one day actually meet in person :). Enjoy, Donna.

Tomorrow I will outline a few basic steps for you to draw a lovely free-hand mandala. It really is very easy. I promise!
The Creator's Leaf

Friday, July 19, 2013

Shine, by the Newsboys

Shine
(lyrics by the Newsboys)

Shine.
Make 'em wonder what you've got,
make 'em wish that they were not
on the outside looking bored.
Shine.
Let it shine before all men.
Let 'em see good works, and then,
let 'em glorify the Lord.
When you let it shine,
you will inspire
the kind of entire turnaround
that would make a bouncer take ballet,
but out of the glare
with nowhere to turn
you ain't gonna learn it on "What's My Line?"
Shine.
Make 'em wonder what you've got,
make 'em wish that they were not
on the outside looking bored.
Shine.
Let it shine before all men.
Let 'em see good works, and then,
let 'em glorify the Lord.
Shine.

(Stillman & Birn Zeta Series Sketchbook, water colors, 
Twinkling H2Os, micron, uniball pen)
The Creator's Leaf