Those of you who are faithful in following my blog already know how devoted I am to Dylusions Ink Sprays. I didn't think color could get any better.
But.
I was wrong!
(Wow! There's a trash can. I don't post that every day.)
A couple weeks ago, I went to Walt Disney World, checked into a hotel room, and drew and painted for 4 days. It was amazing!
This is what an art studio looks like in a hotel room. Hahahaha!
Tiny little table, a trash can, and a chair.
Everything else came from home.
These came in the mail the day before I left.
Dylusions just came out with a line of twelve paints that are every bit as bright and beautiful as you see here. And they are designed to match the ink sprays.
So much awesome in a little jar.
If you are lucky enough to find these in stock,
be careful when you open the jar.
The paints are very soupy and liquidy.
I'm ok with that, as long as I know it before I open the jar.
Even though I knew that, I still managed to spill a bit of pink on my hands.
(At least it was pink!)
I wasn't sure how the paints would work as thin as they are in the jar,
but they work incredibly well.
For this piece I used a flat paintbrush to put the color down.
(Squeezed orange, lemon zest, and bubblegum pink.)
You need to know up front what you want to do,
and you need to move with a purpose
because these are some fast drying paints.
They are permanent when dry, so any blending you wanted to do is going to be lost at that point.
Once I got all my color down, I used my fingertips to spread and blend and smooth.
I don't mind having color on my hands - I figure it's just a given when I work with color so much that my fingertips come in a variety of colors.
Isn't that normal?
So paintbrush and fingertips technique. √
It worked very well!
See those jar lids? There's a lot of paint on those lids. That's actually what I used first.
As you can see, for this piece I used a piece of sponge. I just dabbed it into the lid to pick up color, then rubbed it on the paper.
(I was using 140 lb. Bristol Smooth.)
These colors are amazing. I used lemon zest, fresh lime, and london blue. They go down smooth, no creases, no lines.
I got a little heavy-handed with the color in that top corner (I know, hard to believe, hehehe) so I added a little white linen with my fingers . . .
. . . and used a baby wipe to rub the white into the blue. My blue color was almost dry when I did this, so the baby wipe helped keep moisture present while I blended the colors. Worked great! Who knew?
I knew this was going to be the first piece of many from my trip that I was going to tangle on.
Anytime I tangle on paper that has what was once wet media on it, I prepare the paper by buffing it with a paper towel. This removes any loose residue that might clog - and ruin - my pens. Just a quick little step that makes such a difference.
Love, love, love how this turned out!
Sponge technique. √
Moving on with crushed grape, bubblegum pink, and white linen.
Some people have mentioned online that they had problems with the pink and purple paints being thicker, with a scum-like layer over the top.
I did not have this issue with any of the paints.
I have opened all jars and they all look soupy and beautiful!
Again I used a sponge and worked from the jar lid.
This time I used the sponge in smooth circular rubbing motions - it laid down some beautiful, smooth color.
And, yes, I know I used the word smooth twice in one sentence, but that is what it was . . . smooth.
I did the same thing on the bottom half with the pink,
but I forgot one major point.
This paint dries fast.
You ever heard that old saying "watching paint dry?" Well, they weren't kidding.
I spent too much time smoothing and did not get a good blended line between the two colors.
So, I figured one way to detract from that was to use a stencil to draw the eye away.
I used the other side of the sponge and pounced some white through that stencil.
If you use your sponge for more than one color, be careful that you don't mix paints in your jars.
* * * I have since bought a set of makeup sponges at Walgreens that come 12 in a package.
One for each of the 12 Dylusions Paints.
Sponge and circular technique worked pretty well. √
In fact, I liked that stencil idea so much (and the pink!) that I thought I'd do another.
Bubblegum pink with a little white linen blended around - both done with a sponge and rubbed into the paper with circular motions.
Stencil placement.
This is totally at your preference.
I used a little finger dauber to put some color onto my craft mat. I rubbed it around to spread it out a little, then pounced the color through the stencil with the dauber.
At first I thought the design was too light, so I added more color. I'm not sure what I will do with this piece but I love it. Probably my favorite from the Dylusions' test run.
Here is an example of what not to do.
Do not pounce color over the edge of your stencil
or you will get these awful lines.
I tried to cover them up,
I tried to wipe them off with a baby wipe,
but by time I noticed them my piece was dry to the point I couldn't do anything.
When they say dry when permanent - they aren't kidding.
This was one of those times I had to get up and walk around the resort awhile. Thinking about how to save this piece. I hate to waste anything. So I went back to the room and started by tracing the stencil lines.
And next I added some tangles.
Yes, I can still see the mess here,
but if I didn't know up front that there was a mess - I don't believe I would have noticed it.
I call this one the How to Save a Mess Technique. √
Hahahaha!
(Not the product's fault, totally my fault.)
I watched a video recently where someone (I think Barb at Joggles, but I'm not sure) did some color blocking so I thought I'd try that.
For this technique I used only my fingers.
Rubbed color back and forth with my fingertips, trying to make a color block page.
I know it looks a little wonky here, but it is going to look awesome amazing! after I tangle it!
I promise!
So, Fingertip Blocking Technique √ -
totally awesome!
Here is a photo of the cool projects I made at Disney World.
I saw much discussion online about whether or not you could successfully use the Dylusions Paints on a gelli plate. Dyan Reaveley, the creator of the Dylusions line, said anything you can do with regular acrylic paints you can do with Dylusions Paints.
That means you can paint with them,
it also means you can gelli plate with them.
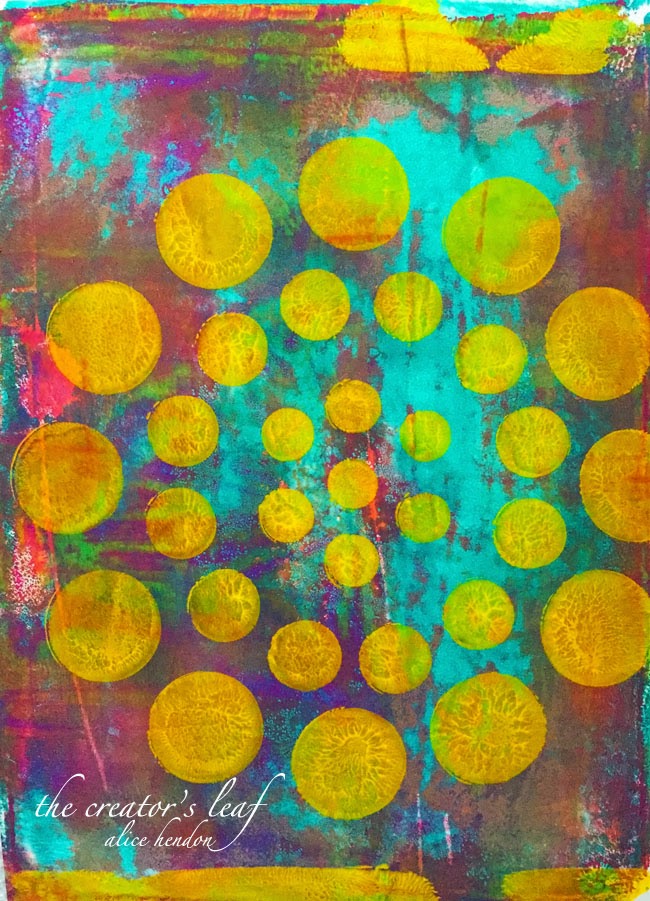
These are some of my gelli prints I was able to make.
One of the main problems people were having using gelli plates was how fast the paint dries.
I have a bottle of extender, it's by Golden and they call it Retarder.
Basically it slows down the drying time of your acrylics so you can extend the length of time you have to work with your paint.
So. Before I did any work, I put a small amount of retarder on the plate and rolled it across as much of the plate as I could. It's clear, so it's a little hard to see.
Then I started adding my paints and proceeded as I would with any acrylic paint.
As you can see, I used stencils on these also.
And they turned out great!
I didn't have any trouble at all with the paint drying too fast.
All of these gelli prints are what they call one pull prints. Meaning, I never clean the plate. I just keep adding color and doing my thing, lifting prints. As you go along and you have more and more bits of color left over on the plate, you start to see little bits popping up here and there in your lifts.
Here you can see that leaving color on your plate and not cleaning it all up can give you some pretty nifty pulls!
Gelli plate technique - major success! √
Overall, everything I tried with the Dylusions Paints was successful. I need to work on blending lines between two colors, but other than that I was very happy with my results.
The colors are bright and intense - just the way I love them. The paints go down smooth and flow easily, just remember they dry fast. And the pieces that I have since tangled with microns worked great. Penwork goes down easily with no nib grabs, or skips, or problems of any kind. Tangling on these papers was fun!
Dylusions new Paints - you can't miss with these!