Showing posts with label ink. Show all posts

Wednesday, November 20, 2013

Making Backgrounds

www.thecreatorleaf.blogspot.com
Today I wanted to take a break from tangling and just start some backgrounds. I had some new product I wanted to try out, so that's what I did. What you see above is a spread in my art journal. The background is complete and ready for me to start adding either journaling, ephemera, pictures, or tangles. That would be a decision for another day. Today was all about playing with colors and trying this new ink spray.
Here is what I used. The pages in this Dylusions Creative Journal are 8" x 5". I love the larger size Dylusions Journal. This smaller version I am a bit disappointed in. It doesn't hold up to wet media as well as its larger version.
www.thecreatorsleaf.blogspot.com
For color, I tried these new (to me) Heidi Swapp Color Shine sprays. I remember Heidi from my old scrapbook days. Based on the name alone, I bought these three bottles of color.
Here is my process. Open your journal up to a clean spread. I like to place a couple sheets of computer paper/scrap paper under the flaps to protect my work surface from ink. Any time I work with inks or sprays, I cover my work surface with a craft sheet from Ranger. It's a surface that wipes clean every time, no matter what product you use. I have also at times just covered my table with butcher paper. That works well, too.
For color I used amethyst, teal, and pink. I spritzed the colors onto dry paper and let it sit and dry for a moment. I notice my amethyst looks blotchy in the top left hand corner. I had some problems with the spray coming out of the bottle in a big blob at first. Lesson learned. Practice on scrap first. The other two bottles worked great!
Next I used these cool masks from Julie Fei-Fan Balzer. I placed the mask down on one corner and spritzed color over it. 
www.thecreatorsleaf.blogspot.com
When I lifted the mask, this is what I had. Of course there was ink on the face of the mask. I don't like to waste product, so I flipped the mask over and placed it down on the adjacent page, pressed down so the ink would adhere to the page, and lifted the mask away.
www.thecreatorsleaf.blogspot.com
This is how it turned out. Spritzing over the mask above, gives softer focus. Flipping the mask over and pressing the ink straight onto the page in the shape of the flower gives more texture.
www.thecreatorsleaf.blogspot.com
I did the same thing here with a star mask . . .
www.thecreatorsleaf.blogspot.com
. . . then flipped the mask over and pressed it down onto the middle of the left page. This is what my two pages looked like at that point.
www.thecreatorsleaf.blogspot.com
To finish it out, I used a couple stamps and placed some random images. This is what I ended up with today. 

I have to say again I was disappointed with this particular journal. The colors bled right through to the back side of the pages, rendering those pages useless for light colors - without a coating of gesso. 

The inks are not what I am used to, but I think I like them. They are more subtle than the Dylusions Ink Sprays. What they lack in brightness, they make up for with loads of glitz and glamour. Shiney and fantastic! 

Now I plan on going back in with my microns and copics and tangling some awesomeness onto these two pages. I'll show those to you soon!

The Creator's Leaf

Wednesday, October 3, 2012

Tangle Fun

A tile I put together yesterday. If you follow my blog, or my facebook page The Creator's Leaf, you will have noticed that I've been doing a bit of creative work with paints and ink sprays lately. This particular tile started off looking like this:
I am having a lot of fun making these different tile. A couple people sent me messages to ask if I would actually be able to tangle on these tile. They were concerned that the paints, or inks, might be too dark and that you wouldn't be able to see the drawings. As you can see in the first photo, that is not the case. The tangles actually show up quite well. The final colors in the tile were actually darker than what you see in this shot just above - I wasn't completed with it when this photo was taken. Once the tile are completely dried, they are ready for you to tangle any design your heart desires!

Here is a link to the post where I showed step-by-step directons for how to make these tile. You really should give it a try! You know you want to!
The Creator's Leaf

Friday, September 28, 2012

Salt and Watercolor Wash

just add water silly's blog hop link
This week in the Artist's Play Room, our challenge was to try out something we had been wanting to do! Recently on the CZT facebook page, I watched a youtube video about using kosher salt on a watercolor wash as a different technique. I watched several videos on this technique and everyone said you really needed to use kosher salt, that it just worked better. So, off to Wal-Mart I went. This afternoon I took a 5"x7" piece of watercolor paper, covered it in a generous layer of water, and started moving some color around. For this project I used a basic kids watercolor set from Michael's to push some color. I let it blend and run and start to set up, then sprinkled some kosher salt in a couple areas. I didn't cover the whole piece so that I could see the effects of the salt.
Not sure why, but as it dried the colors softened up. The picture above was taken after the piece had dried and I had brushed off the excess salt. I like the edges of color lines - I'm guessing they were caused by a reaction with the salt.
And because I'm such a messy painter, I had paint on the backside as well. Which works out fine because I can use this as a two-sided page in an art journal.

Here is the youtube video I watched to learn this technique. I did not paint my page in the bathroom, however.
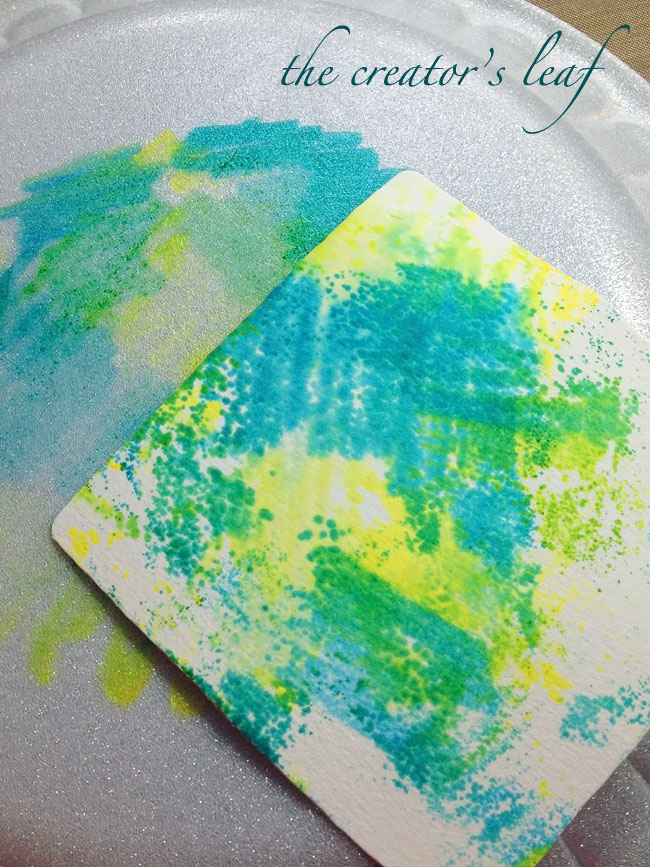
I learned this technique on Pinterest. Pinterest is a great place to learn a hobby! That's where I learned about art journaling, and where I first heard of 'zentangle.' This blog began as a result of what I learned on pinterest. Anyway, here I took three different colored sharpies and scribbled them on the back of a styrofoam plate. I was supposed to use something hard plastic - non-porous. This worked alright, but something hard plastic would have worked better.
Next, I sprayed the color with a little rubbing alcohol which caused the color to bleed and blend a bit. Then I turned a zentangle tile over and laid it in the wet color, which allowed the tile to soak in the color.
I was able to color two tile with that little bit of sharpie. If you don't want to use sharpies, you can also use copics or alcohol inks. I expect they would probably work better - I just couldn't remember where I stashed my alcohol inks the last time I got "organized."

I tried at least three more watercolor/paint/ink techniques which I would like to share with you, but it is 1:00 AM now and I should really go to sleep. I need to get up early tomorrow to go have my hair re-pinked! Yay!!!!

Head on over to Jenn's page - Just Add Water Silly - which is where the Artist's Play Room is hosted. Check out all the blog posts and maybe even share one of your own!
The Creator's Leaf

Wednesday, August 1, 2012

It's All About the Pink!

Inspiration Avenue Challenge Link
This week at Inspiration Avenue, Cindy of Cottage Remnant is hosting the challenge. (She's also been very busy revamping/re-constructing my blog :). For the challenge - Cindy chose Perfectly P!NK, and if you visit her blog you will see why.
This is my finished project. A little different from what I'm used to, but I like how it turned out :). Here is what I did.
Supplies included Studio G ink pads (Wal-Mart for 97 cents,) dabber duos (had these for years - I was surprised they still worked,) a stippling sponge, and a template for the cup. I placed the cup template onto my 5" x 7" white cardstock and lightly dabbed first the green ink, then the pink ink inside the cup opening. Then I used the dabber duos to pop some dots on the cup. (All that mess rinses right off the template - no worry.)
Next, I removed the template and made sure my inks were dried by blasting it for a couple seconds with my heat gun. I found the quote online - google searched for coffee quotes :). A simple black 01 micron pen was used to tangle some patterns - florz, some swirls, and maybe some weave.
Then I started adding in some color with copics:
  • YG11 mignonette
  • RV10 pale pink
  • YG13 chartreuse
  • RV14 begonia pink
  • C3 cool gray
  • W5 warm gray
  • G00 jade green.
A shot of all the supplies I used - except for the black micron :).
Lastly, I outlined the coffee cup with the micron. And, popped a little logo in there under the handle. Easy to do and a lot of fun! You should check out Inspiration Avenue where everyone is posting about P!NK, you could even post some artwork of your own!
The Creator's Leaf

Tuesday, July 17, 2012

Watercolored Flowers For Kali

Photobucket
Lately Kali has been making an art journal. She's using an 8" x 6" three-ring binder and making her own pages to go in it. She asked me to make a couple pages she could put in her book - so I did. 


I cut an 8" x 6" piece of watercolor paper and got started. Above, I used a simple watercolor set and slapped on some yellows and greens for a background. No rhyme or reason - just get the paint on the page :). I used a stencil from TCW (TheCraftersWorkshop.com), some drywall tape, a dabber and some Studio G inkpads to lay down some background pattern.  I tangled the flower line next, added some Twinkling H2O paints on them, and drew in some spiraled vines. Stamped a couple butterflies, attached some tag and flower art and was pretty much done with my first side. 
Photobucket
Then I flipped the page over and worked on the back. I started the same way - by watercoloring some blues, teals, and magenta for a background. I sprayed on some raspberry Inkadinkado spray ink, sailboat blue Jim Holtz color wash, and some purple twilight Jim Holtz color wash. (I like the inkadinkado colors, but now all 10 fingertips are pink and I can't get the color off.) I used some stamps, a Sizzix punched flower, and an old music tag - no idea where it came from. Sorry. And I tangled some laced around the flower edge. Super simple page and Kali loved it! 


Easy. Simple to do. Fun. I need to do more of this!