It's time for another
Art on a Shoe String!
This week let's make backgrounds
for tangling, for cards, for art journaling -
or just because they are pretty!
Using tissue paper.
Yes, I did say tissue paper.
The trick here is to find some tissue paper
that bleeds when it gets wet.
I believe most tissue papers do,
so that part should be easy.
(I believe this would work with
those awful crepe paper rolls we
used to decorate with when we
were kids.
Cue the A.L. Bristol students here.)
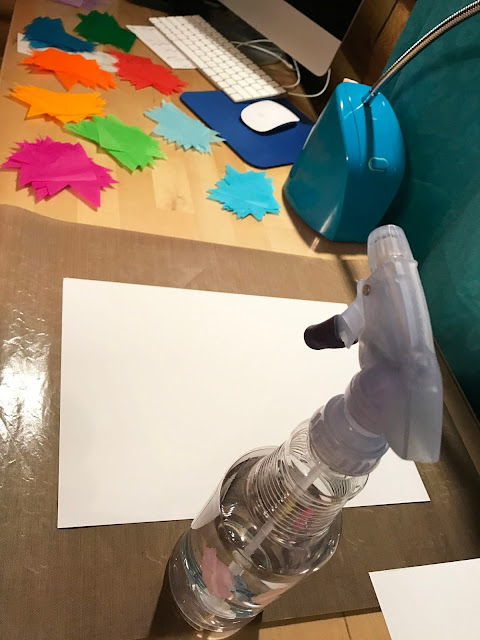
I grabbed all the light to almost dark colors I had
and starting cutting strips
into 3" squares,
then I triangled them.
Any size will work -
and next time I am just going to tear
them into strips and try it that way.
Supplies are super simple.
Tissue paper triangles,
heavy paper (mixed media or watercolor)
and a spray bottle of water.
Here we go.
Spray that paper and cover it with water.
If you don't have a spray bottle
use a mop brush and generously cover
one section of the paper at a time
with water.
So this is the first time I've ever done this.
Hahaha!
You and me!
Let's do this!
So.
Take your seriously wet paper
and begin placing triangles from the
bottom and work your way up.
I found this to be the easiest way for
me to work.
Bottom to top.
It's ok if they overlap a bit,
if there is a gap a bit,
if they are crooked a bit -
or a lot.
And keep placing tissue paper triangles
until your paper is covered.
You will see the color is bleeding well.
And it is bleeding from one triangle onto
the next.
Little rivers of water are flowing from
one to the other.
Happy dance!
And all those wrinkles should cause
some texturing to happen.
And all those wrinkles should cause
some texturing to happen.
When the whole piece is covered and wet,
let it sit for 20 minutes with no help
from you.
Don't get tempted.
Give the water and ink time to work.
After 20 minutes remove all the tissue paper.
Realize that your hands are going to get stained.
Realize the tissue paper is still wet -
don't let it drip on your clothes,
or your sofa,
or your rug.
I have to say this is my least favorite of
all the pieces I did.
This was my experiment piece.
I learned that some of my tissue paper
was toooooo dark,
so I threw the extra triangles of those
colors back into the basket.
(Just kidding. I really threw them in the trash.)
(Just kidding. I really threw them in the trash.)
I noticed the edges weren't defined.
The whole piece looks blurry to me.
(The photo isn't blurry.)
Mark mentioned all the white spaces,
but I didn't really mind those so much.
So, keeping those points in mind,
I moved on to my second sheet of paper.
Second sheet of paper!
After I placed all the triangles,
I made sure they were all wet.
Some I had to spray more water on.
I made sure all the edges were tapped
down and in place.
I stood here at my desk,
staring out at all my beautiful snow,
and wondered where I could go
with this technique.
To the right of my window is a box
where I keep unfinished projects.
This is the one that sung out to me.
I've been tangling this piece for a
couple years, off and on.
I love the colors.
Dylusions Ink Sprays, of course.
Which can be a little pricey
and
many places don't sell them.
So I wondered if I could achieve similar
results with my cheap little tissue paper.
So I pulled out another sheet of paper
and began placing triangles in a
similar color arrangement.
(Don't ask me where that green
one came from.)
Lots of water,
tamped down edges,
plenty of little wrinkles and
hills and valleys
for water to flow under,
and wait 20 minutes.
Here is another Dylusions Spray Ink
sheet I did awhile back.
I love the colors and the way
they play with each other.
Could I make something similar with
my inexpensive tissue paper?
I tried to do a better job with
triangle placement on this one.
There is some overlap and
very little gap anywhere.
Here is an example of those
folds and valleys I was talking about.
Those little places where the triangle
isn't touching the paper.
Those make for some awesome texture -
if they aren't too big!
if they aren't too big!
I did feel the gap here was too big,
so I placed another piece of tissue
paper right over the gap.
Not worrying about lining it up with
the others.
Just get it on there.
Make sure the edges are all down.
I even sprayed more water over
the top of all the triangles.
This is another Dylusions piece
I made awhile back.
Two colors - fresh lime and London blue.
Let's give this one more shot!
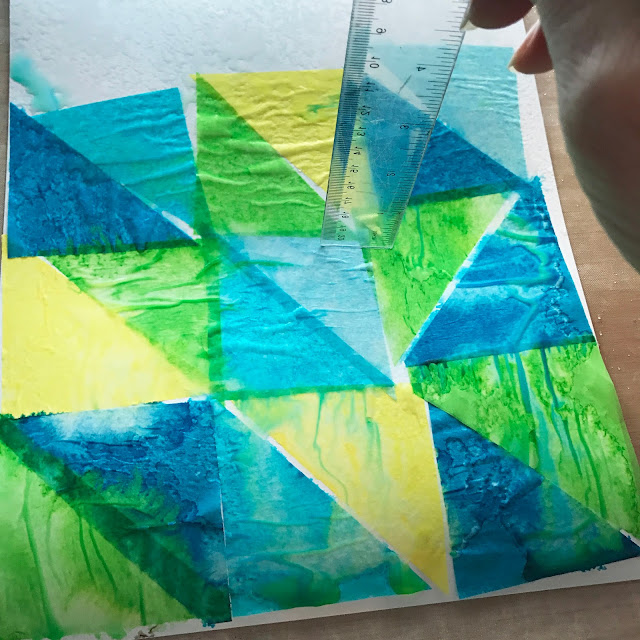
I used green, three shades of blue,
and a little yellow.
I didn't want the colors to run too much
and the paper was curling up,
so I held it down in the middle with
a ruler until the paper settled
down a bit.
I used that ruler to make sure all the
edges were tamped down.
Even had a little overlap on this one.
Plenty of water
and I covered up one gap.
And waited 20 minutes . . .
. . . then I started peeling off the paper.


Absolutely gorgeous. Love the softness of the colours.
ReplyDeleteThanks. An inexpensive project that worked. 😊
DeleteI love this 'art on a shoestring' concept... you post the coolest things, Alice. :-) beautiful colors too, as usual!
ReplyDeleteFun and affordable 😊
DeleteI adore that last one - so typically 'Alice' & I'm looking forward to seeing how you tangle it, I wish I could have a face to face tutorial on how you choose where to put what. I had to chuckle with your photo of keeping everything in place using the ruler - presumably your studio assistant Aurora is learning to take photos? I suspect not & could just imagine you taking the photo one handed (left) whilst balancing everything. Keep warm with all your snow.
ReplyDeleteHaha! One handed skills are the best!
DeleteLove how you play around with different techniques. Thank you for sharing
ReplyDeleteYou're welcome. This is the best way to learn.
DeleteNice tutorial. Have you ever tried isopropyl 100% alcohol on WET paint? Drops of it make lovely round holes where the colour has disappeared, but caution, don't use too much at a time and if possible don't inhale! :-)
ReplyDeleteI have. I keep a spray bottle of it next to my desk. And yes, the fumes are bad for headaches. Haha! Trust me. I know that for a fact.
DeleteThanks for replying. Correction: GOOD for headaches - oh and house fires if you smoke at the same time as using isopropyl!!! I'm going to try using thin layers of kitchen paper or the backs of paper napkins this evening as I don't have any tissue paper until the shops open. I'll let you know how it goes! It may be too soft.
DeleteLet me know how it goes.
DeleteSorry, forgot to tick the mail-me box first time!
ReplyDeleteMy first attempt has to be seen to be believed. The result of putting paint on paper then kitchen paper and soaking it was moderately OK, but nothing like as nice as what you have done. I'll get to an art shop tomorrow and buy coloured tissue paper. The problem with kitchen paper (I did not try to colour it directly) is that if it's thin enough it also breaks up. I had already made so much mess that I got some drawing inks out and used that on one piece of paper following that by soaking and duplicating by putting drawing paper on top. I've done that before on canvas and it is interesting to see what happens and what can be made of the results. The result with inks was usuable, but I prefer the triangles! I can send you photos if you tell me where to!
ReplyDeleteKenoly2000@hotmail.com. Glad you had fun.
Delete