I've been wanting to work on canvas for quite awhile now. While I was in Ontario, Cindy took me to a local store where I found some small canvases I brought home with me. This is one that I completed after I got home.
This was the first project I did with this new texture spray. Irresistible colored texture spray. I have to tell you that I am not a fan. Out of the four bottles I had, only the bottle of blue sprayed. I had to transfer the other three bottles worth of ink into some empty spray bottles I had here. Plus, I could not get two of the colors to mix well. The colors stayed kind of watered down and separated looking. But, this is what I used.
I was finally able to get some colors down, and sprinkled salt over the top.
Next came the saran wrap. Plastic wrap.
Patted down to the canvas and left to sit for 24 hours.
When I came back the next day, the salt had 'melted' but the colors were still wet. So I left the wrap off and let it sit for about a week. Seriously.
And this is what I ended up with. I was pleased with how it turned out, but it was a monumental pain to do. Nothing went smoothly and those irresistible inks were totally resistable! Actually, I did try them one other time and they worked even less stellar than they did this time. Thus, they have been tossed into the circular file that sits near my desk. Dump-A-rooed big time! Resist the irresistible!
 This week in the Artist's Play Room, our challenge was to try out something we had been wanting to do! Recently on the CZT facebook page, I watched a youtube video about using kosher salt on a watercolor wash as a different technique. I watched several videos on this technique and everyone said you really needed to use kosher salt, that it just worked better. So, off to Wal-Mart I went. This afternoon I took a 5"x7" piece of watercolor paper, covered it in a generous layer of water, and started moving some color around. For this project I used a basic kids watercolor set from Michael's to push some color. I let it blend and run and start to set up, then sprinkled some kosher salt in a couple areas. I didn't cover the whole piece so that I could see the effects of the salt.

Not sure why, but as it dried the colors softened up. The picture above was taken after the piece had dried and I had brushed off the excess salt. I like the edges of color lines - I'm guessing they were caused by a reaction with the salt.
And because I'm such a messy painter, I had paint on the backside as well. Which works out fine because I can use this as a two-sided page in an art journal.
Here is the youtube video I watched to learn this technique. I did not paint my page in the bathroom, however.
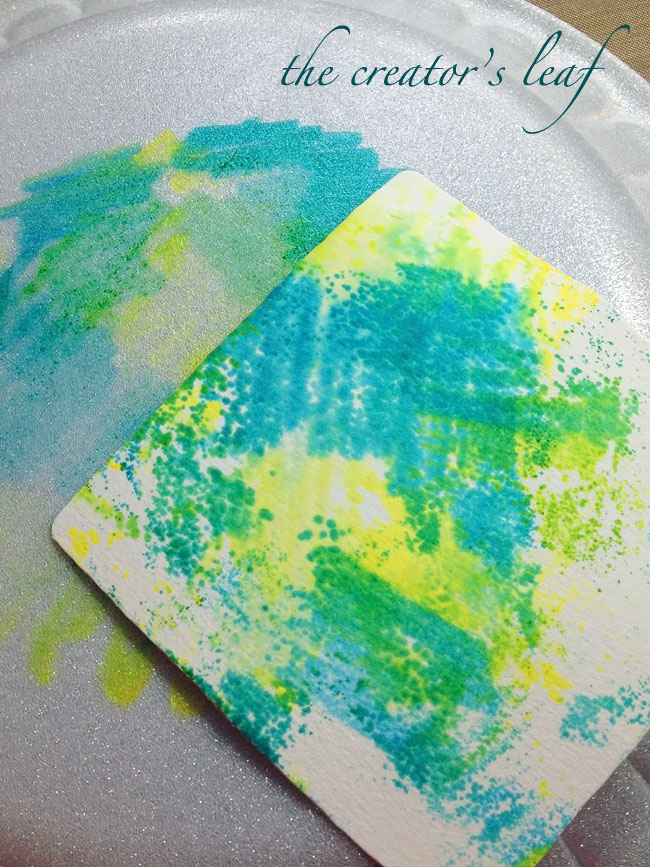
I learned this technique on Pinterest. Pinterest is a great place to learn a hobby! That's where I learned about art journaling, and where I first heard of 'zentangle.' This blog began as a result of what I learned on pinterest. Anyway, here I took three different colored sharpies and scribbled them on the back of a styrofoam plate. I was supposed to use something hard plastic - non-porous. This worked alright, but something hard plastic would have worked better.
Next, I sprayed the color with a little rubbing alcohol which caused the color to bleed and blend a bit. Then I turned a zentangle tile over and laid it in the wet color, which allowed the tile to soak in the color.
I was able to color two tile with that little bit of sharpie. If you don't want to use sharpies, you can also use copics or alcohol inks. I expect they would probably work better - I just couldn't remember where I stashed my alcohol inks the last time I got "organized."
I tried at least three more watercolor/paint/ink techniques which I would like to share with you, but it is 1:00 AM now and I should really go to sleep. I need to get up early tomorrow to go have my hair re-pinked! Yay!!!!
Head on over to Jenn's page - Just Add Water Silly - which is where the Artist's Play Room is hosted. Check out all the blog posts and maybe even share one of your own!