Yesterday was a pretty scary day here in Maryland. Plenty of rain and wind and snow and did i mention rain? Courtesy of Hurricane Sandy, now known as Superstorm Sandy - the worst storm in the history of the United States. Kali and I rode out the storm in Maryland as we waited to hear if she would be able to take her entrance exam for the pastry college today. And while I waited - I watercolored.
I began by drawing my outline. I left my circle template in Florida (can't believe I did that!), so I scouted the hotel room for circles to trace. The smaller, inner circle is from a hotel water glass :) and the larger, outer circle was made by tracing the lid of the ice bucket :). You gotta do what you gotta do! Then I divided the area into sections.
Tangling was the easy part. Then I stippled the heck out of the center. I did something similar once before - except that turned out to be a flower. This looks more like a math project gone wrong. OR a fun math project!
The project I was working on for my class called for a prismatic approach, so I drew a string in and around my sections and background . . .
. . . and began laying color. The thought was to make my focal point stand out from the background by my color choices. Of course I used my Derwent Inktense Pencils. The only way to go with watercolor. Well, not really, but it's my preferred way because the colors you get are so bright and vivid and intense. A waterbrush and pencils. Easy peasy.
For the most part, I tried to separate the colors where the string line made divides. Didn't always accomplish that, but I tried.
I figured the central focal part would be the hardest, so I did all of that first. I went with variations of purple, pink, and blue because I really like the way those colors look together. I have actually had my hair all these colors - one at a time, not all at once, although I'm not totally unfond of the idea.

Then I picked out yellows and greens to do the contrasting background. Once this was dry, I went back to my copic multiliner and added the penwork shading. All shading and detail work was done with this multiliner. It's always a challenge for me to figure out shading on color - the black penwork is the way to go! This was a fun project, not hard to do, and I was very satisfied with the results. I am not one to be able to draw awesome pictures of flowers and ladies and animals and landscapes, but I can tangle me up a bunch of artwork! Throw some bright color on there and I am one happy lady sitting in the midst of one scary, scary, scary hurricane! (And I still have the heater set on 82, trying to warm up! Florida, oh how I miss you!)

It is hard to believe it's been 24 weeks since Erin started the Zendala Dare. I participated in her first dare. It was my 3rd post on this new blog. Since then I have gotten fully immersed in this art style called zentangle, to the point that last month I trained and became a certified zentangle teacher. For jollies, here is the zendala I drew for that first challenge.
I have learned a lot since then, but I still kind of like this zendala. Haha! Wow! I've learned a lot about editing since then, too.
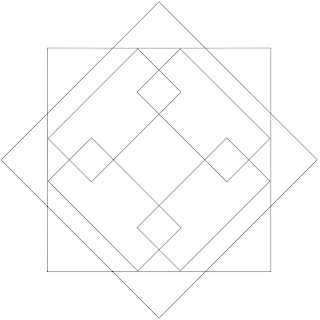
Back to week #24, this is the template Erin gave us to work with. I didn't really know what I would do with it, nothing was coming to mind. So, I just picked up a pen and started with that center square. Then I moved on to the main square and dreamed up some borders. I enjoyed trying out Helen's petal ribbon (a take-off of finery,) which you can see on her blog A Little Lime here. A really pretty and fun variation! From there, this tile just kind of took on a life of its own. Throw in some Pitt artist pens and Derwent Inktense Pencils, flick a little color around, and call it done.
Several people have asked how I take photos of my tiles for posting. My main problem is always finding even light. Look for a spot where you have the same amount of light across your tile - and background, if you use one. Be careful around windows because you will get some sunlight, some shadows, making your photo uneven.
Every photo on my blog has been taken with my iphone 4S, even though I have an excellent canon, the iphone just takes good pictures. I get as close as I need to so that the tile and a minimal amount of the background fill up the screen on my phone. I lean against my chair, lock my arms to my side, hold my breath, watch for the square on the phone that tells me the shot is in focus, and gently push the button. No snapping, no jerking, no punch the button to get it over. Gently, so your photo is sharp. Then I just email the photo to myself for editing. And that will be the subject of a different post.
Head on over to Erin's page The Bright Owl and check out all the incredible zendalas! You should really draw one of your own and post it for us to enjoy :).
A couple weeks ago, Laura offered a Diva Challenge of using a blind string. Just take a pencil and a tile, close your eyes, and draw a string. No conscious thought, just draw. Well, it was so much fun that I decided to try it again. Here's my string above.
And here is my completed tile. I started with that crescent moon in the middle and the tile just kind of took on a life of its own. I don't think I tried any new patterns, just familiar ones.
Now, time to work with Genevieve's mandala templates! Yay!!!
This was me. A little over a week ago. I was waiting for CZT training to start. I couldn't wait! I got to Rhode Island a day early so that Kali and I could fly to Baltimore together. She got off there to spend a week in town, I changed planes and flew on to Providence. The hotel was in a sketchy looking part of town - at least at night - so I didn't wander off to explore. Instead, I stayed in my wonderful room and practiced. I'm still new to zentangle, but I am loving it and enjoying learning something new every day! And here I am - a little over a week later - and I'm certified now to teach zentangle. I have my first series of classes already set up. I'll be working with my favorite home schooled kids! Going to be so much fun!!!