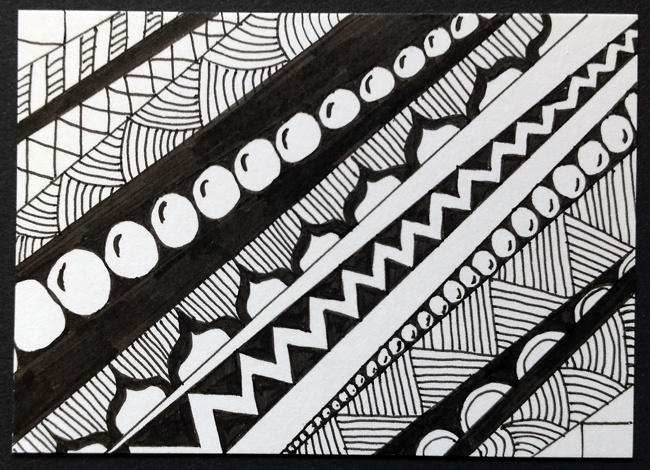
Showing posts with label onamato. Show all posts

Monday, January 9, 2017

Tangle It! Journal Study Week 2

It is week 2 in our
Tangle It! Journal book study!

Over on Facebook in my group called
Zentangle All Around,
we are working our way through
this book that I co-authored and illustrated. 
Above is my entry for today.
Trace and tangle your hand.
To join us in our journey, get your book here.
Then head over to Facebook and join
Zentangle All Around. 
I'll meet you there!

Tuesday, July 28, 2015

A Few More Dropz

Dropz is a super fun tangle to work with!
Here you see the regular version on the left,
and the reversed version on the right.
To see the step out go here

I also used another my tangles - All Boxed Up -
the step out for it is here.
And I included printemps, 
a loose version of onamato,
and atorm.

Background is a leftover piece of scrapbook paper.
My go-to paper recently.
You should look around your area for a cool
piece of paper you can tangle on!
I'd love to see what you do. 

The Creator's Leaf

Friday, July 24, 2015

Scrap Tangling


I love my Dylusions Ink Sprays.
I use them all the time.
I love lots of bright, wonderful, vivid color.
Can you tell?
 And I never throw any of it away.
Seriously.
I have scraps that are 1" x 3".
Occasionally I will pick up a scrap 
and start tangling on it.
I try to tangle within the color.
Find a patch of color and start there,
then just go with whatever direction
it takes me in. 
My heart tells me when it is finished.
And this piece?
Is finished.
No up or down,
no right way for it to be positioned.
Just lots of yummy, colorful, tangled up fun!

The Creator's Leaf

Sunday, July 12, 2015

Tangling With Mickey

One of our recent stack and tangle prompts was to
use found papers. 
To find a paper that you could tangle on and turn
into a piece of art. 

It just so happens I checked into a Disney World resort
that day and had a packet of information available to me. 
I found this sheet of paper, 
a bit water-rimmed and stained from someone before me's drink.
Shame on you, housekeeping, for leaving me someone else's coaster as part of my introduction to Disney World.
Anyway, I liked this sheet of stained paper because of the photo that was on it -
Mickey and some awesome cast members.
The rest of the page had information about staff
and safety tips. 

I divided my drawing area into segments, 
then started filling them in with tangles.
I did a little shading - which didn't work well on this slick paper - 
and called it done.

Tangling with Mickey.
Apropos title, I think. 

The Creator's Leaf

Sunday, May 24, 2015

Stack Your Stripes

Here is a new stacking challenge for you -
stacking stripes.
Basically this means one tangle per stripe,
all stacked on top of each other
or next to each other.
Stacked stripes can be horizontal or vertical.
And one tangle per stripe.
This is a great way to learn some new tangles,
and to practice the ones you've been working on.
These two I'm showing you are very different in appearance.
I did not plan it that way, but that is the way they turned out.
Why don't you give stacking stripes a try today?

Thursday, February 19, 2015

Garlic and Joey

I've been playing with this shape a lot lately.
(I'm so cold I'm having trouble typing.
Back space, correct, go forward, repeat.)
Playing with different ways to fill this shape -
that totally looks like a bulb of garlic to me,
for some reason.
That background is a 5" x 7" pull from a gelli plate.
Joey's Challenge this week was called 
The Polka Dot Tangle.
Randomly drawn circles, 
each filled with a different tangle.
It's really good practice for quick tangles.
For this 5" x 7" piece, I used my new 
Prima Color Bloom Spray Mists.
I've used them before and my pens worked great over the color, but for some reason this time
my pens did not work so great. 
I used a sharpie fine point and had
trouble filling in the dark areas.
I tried shading, but the color wouldn't hold
the graphite. So. Here it is.
Unshaded but that's ok.
To participate in Joey's Challenge,
just go here and check it out. 

Tuesday, February 17, 2015

A New Venture

Last week, Mark and I went to the Bass Pro store
for their annual fishing blowout.
So, of course, while Mark shopped Bass Pro,
I shopped the mall attached to it.
In an attempt to revitalize the mall,
they have added a huge art display and shopping district.
 Of the 40-50 artist's booths set up,
I went into one -
because she had some zentangley-style paintings 
and I loved the bright colors.
Her name is Michele Dobbs and she was so wonderful to me.
Michele was tangling on a ceramic cat and I started 
asking her what pens she was using.
Of course. Isn't that the first question we all ask -
what pens are you using. Hahahaha!
Michele was so nice, so helpful,
and one question led to another 
and the next thing I knew, 
we were talking about selling my art online.
Whoa!
I've never really wanted to part with any of my art before.
I keep it all in notebooks, or folders,
or drawers of the desk,
whatever and wherever I can find a place.
She seemed convinced that there is a market
for what I do.
I hope I can find it.
That's what I'm working on now.
Putting into place some of the things Michele
explained to me.
And this is the first piece.
It's in my Etsy store.
And . . . someone has favorited it already.
Now someone just needs to buy it :).
Scary.

Sunday, March 2, 2014

More Underwater Twinchies, APR #95

Under the Sea
(continued from yesterday)
~ The Little Mermaid ~

Down here all the fish is happy
as off through the waves they roll.
The fish on the land ain't happy,
they sad 'cause they in their bowl.
But fish in the bowl is lucky,
they in for a worser fate.
One day when the boss get hungry
guess who's gon' be on the plate.

Under the sea,
under the sea,
nobody beat us,
fry us or eat us
in fricassee.
We what the land folks loves to cook.
Under the sea we off the hook.
We got no troubles,
life is the bubbles,
under the sea.
Since life is sweet here,
we got it beat here,
naturally.
Even the sturgeon an' the ray
they get the urge 'n' start to play.
We got the spirit,
you got to hear it,
under the sea!

(Kind of long, but here's the rest.)

The newt play the flute,
the carp play the harp,
the plaice play the bass,
and they soundin' sharp.
The bass play the brass,
the chub play the tub,
the fluke is the duke of soul.
(Yeah)
The ray he can play
the lings on the strings.
The trout rockin' out,
the blackfish she sings.
The smelt and the sprat
they know where it's at,
an' oh that blowfish blow.

Under the sea,
under the sea,
when the sardine
begin the beguine,
it's music to me.
What do they got? A lot of sand,
we got a hot crustacean band.
Each little clam here
know how to jam here
under the sea.
Each little snail here
know how to wail here.
That's why it's hotter
under the water.
Ya we in luck here,
down in the muck here
under the sea.
just add water silly's blog hop link

Going to add this post to the weekly Artist's Play Room challenge. Jenn encourages us to 'art' and share it in the play room. Why don't you head on over here and check it out.

*  *  *  *  *  *

Twinchies are tiny pieces of art that are two inches square. A whole bunch of artists on facebook are currently involved in a twinchie swap. I can not wait to start receiving beautiful pieces of art from all over the world - literally! These are just a few of the twinchies I will be sending out. More tomorrow.

These twinchies were made on watercolor Bristol smooth from Strathmore, color comes from Dylusions Ink Sprays, and sparklies are courtesy of Wink of Stella Glitter Markers and At You Spica Pens. Click on photo to see a larger view.
The Creator's Leaf

Thursday, September 5, 2013

Teddy Bears and Fall

The fall ATC swap is upon us. I am really having trouble coming up with ideas. It was 90 degrees here today, who could possibly be thinking about fall? For this swap we can use any type media we want. So I pulled some old scrapbook paper and salvaged this little teddy bear and flower blocks from a sheet. The rest is tangled and colored with Koi Watercolors.
I've been working my punkin' pattern into several pieces lately. It speaks of fall, so I figure it's fair game.
I was still having issues with 'fall' ideas, so I thought I'd try something a little different. Made a bunch of random width (and unparallel) lines. . . .
. . . then filled them with tangles.
Next I added some fall-ish washi tape down one end, and pop-dotted three fall leaves into a corner. The ATC edges were dipped into a gold stamp pad. Voila! A fall ATC, and I still don't know what to do with the rest. Haha! Hopefully something fantastic will come to mind. Soon. I hope.  Stay tuned. Better yet - send me ideas. :)

The Creator's Leaf

Saturday, August 31, 2013

On a Roll

I found a postcard I forgot to post. It's on its way to someone lovely. Now it's time to gear up for the two ATC swaps I signed up for. And somewhere in here I need to find the information about the bookmark swap Sandy is doing - because I forgot all about that! But it's all fun :) and I love it!
The Creator's Leaf

Thursday, October 18, 2012

Practicing

I am trying to work on some homework assignments for an online class I'm taking - getting further and further behind. (And it's only week two.) BUT - I want to post something every day - if I can. I started this last night. It's in my CZT field journal. I am trying to have a go at every official pattern. Some of the new patterns I tried here are meer, orlique, and cyme. Aura-leah and springkle are not official zentangle patterns, but I like them a lot!
The Creator's Leaf

Thursday, August 23, 2012

It's a Celtic Challenge

Judy from Creative Doodling offered us a challenge - a celtic knot challenge! A freestyle celtic knot challenge. You can see the link to her instructions here
Step One was to draw your string - draw one at random, with no specific directions other than to have it connect together at the two ends of the string.
Step Two was to draw the contours inside the shapes created by your string.
Step Three was to aura the outside of the entire shape. Apparently I forgot to take a photo of the next step. Step Four was to connect the lines at the gaps, creating over and under sections. (I opted to round some of the corners to smooth out some less than perfect lines.)
Step Five was to rub out your pencil line and tangle/doodle in the sections. This was the fun part! I tried some new patterns and some old.
Next I started adding some onamato in the string.
Completed the onamato with a row of perfs around the outside.
Then I shaded. I was happy with my celtic knot at this point. But, you know how I am. Everything is better with color - even if only a little pop of color!
And so I added a little color with my copics. This was a really fun - and easy - challenge to complete. Judy has just posted challenge number 2! If you want to participate this week, click here to get the instructions. I am going to go check it out now and get an earlier start this week!
The Creator's Leaf

Monday, June 25, 2012

Tape the String - ZIA Journal #25

Photobucket
The ZIA Journal challenge at Tangles and Stuff is called Tape the String this week. To do that, I took a sheet of watercolor paper and randomly placed blue painter's tape on it. Some pieces wide, and some torn into thinner strips. With the tape in place, I slapped on some watercolor paint. 
Photobucket
When the paint dried, I dropped drips of paint on to the page and blew them around with a straw. Once all this was dry I removed the blue strips of painter's tape. In those white spaces I added various tangle patterns. I might do this again tomorrow and tangle the painted areas. We'll see. This was a load of fun to do! And I love the bright colors - I am all about the color! If you'd like to join in this week's challenge and play with tape - check it out here at Tangles and Stuff :).

Saturday, June 2, 2012

Zendala Dare #8

Photobucket
Erin's Zendala Dare this week came about in honor of her friend's wedding this weekend. Here is the blank zendala Erin gave us to use:
Photobucket
The challenge was to use at least one tangle starting with L, one with O, one with V, and one with E, thus making a L.O.V.E. Zendala! Above you can see what I drew on a heart-shaped tile.
Photobucket
I uploaded my zendala to Photoshop and ran a soft and faded action to "countrify" it up a bit.
Photobucket
Then I added a frame and grunged up the background and chalk inked the edges. I don't normally do all this, but thought it would be fun this one time! 


The patterns I used are:
L - Leau and Laced,
O - Onamato,
V - Vortex, and
E - Ebb.


You can check out all the fun zendalas at The Bright Owl. You might even want to try one of your own!

Friday, April 27, 2012

Ribbon Dancer

Photobucket

This was a fun zendala to make! I worked on one of Zentangle's pre-strung round tiles. I'm working hard at learning patterns, trying to remember their names, and perfecting the steps. I'm still having trouble with circles - who knew! I've been drawing circles since I was little, but their roundness eludes me. So, I decided I need to work on patterns with lots of circles :).


I started with the paisleys in the center, then moved to the outer ring with the onamato. The name onamato sounds oriental to me, which led me to add the ribbons around the middle. I thought they looked oriental. Last, I added the variation of weave to connect the outer ring to the central paisleys/pais. I shaded some, still working on that, too. All in all, I'm very pleased with how this turned out. What do you think?