A mess party? Yeah, buddy! I know how to throw one!
Actually, I am taking a one week online class with Carla Sonheim. You know Carla? She's the lady with the awesome drawing and painting books about Imaginary Animals, The Art of Silliness, and The Drawing Lab - all for mixed media artists. I love her work! This week she's teaching a class on gelli plates. (No, not a jelly jar, not a jelly plate - - - gelli plate. Google it.)
Because she makes her living teaching classes like this - I won't go into specifics and how-to's, but I do want to show you what I did with today's assignment.
We were supposed to make eight pages. I liked it so much that I made sixteen! It was a big whopping mess! But so much fun to do! I can totally see me doing this all over again tomorrow.
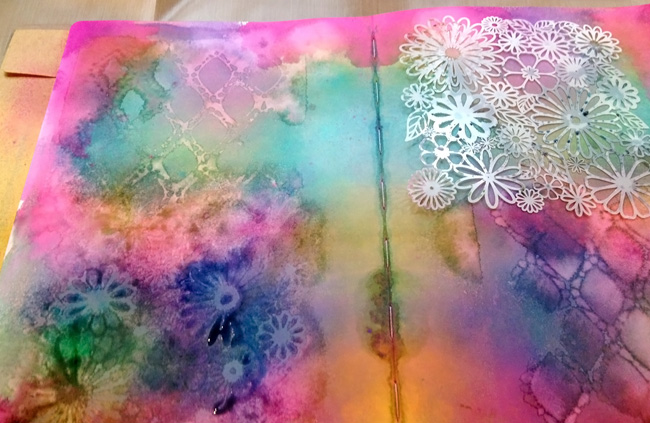
These are two pages (7"x10") that I made. Don't you love the textures? And I totally think that little green sticky-outy thing on the right looks like one of Shrek's horns :). Am I right???
I like the texture in that pink section, and those blues with the pink streaks were total accidents. At least the first one was, then I figured out what caused it and did it on purpose after that :).
These two pages were from the very first set I did. That page on the right is going to be a wonderful underwater tangled garden. I don't have any idea what Carla is going to have us do with our pages we made today, but that one on the right is mine!
These last two pages were my absolute favorites! Blue, a little white, some teal, some of two different shades of pink. Yep! I think I'm going to love this gelli plate thing! And tomorrow we get another lesson. I can not wait! Yay!!!

 I've been wanting to play with paints lately and today was the day!
These are the two final results. I know I still want to do a lot with these two-page spreads, but I'm still contemplating exactly what. Easy-peasy and literally about 10 minutes per spread. Here is what I did.
I started with Dylusions' Creative Journal by Dyan Reaveley. It's a large 11 13/16" x 9" journal, with pages measuring 11 3/8" x 8 1/4". The pages are heavy duty cardstock that hold up to lots and lots of water. I spritzed some water onto my paper, then I sprayed a bit of vibrant turquoise Dylusions Ink Spray onto the wet page.
To make this spread I literally used three colors. As they spread and mix, they make other colors. In addition to the turquoise, I sprayed on some Bubblegum Pink . . .
. . . and Lemon Zest. Then I spritzed more water onto the page . . .
. . . and closed the book. I pressed down the pages with the book closed, then opened it back up again. At this point I had wet, gloppy color on both pages.
I used a wad of paper towels to blot up the water. I added bits of color in the blank spaces, and
ended up with beautiful, bright colors.
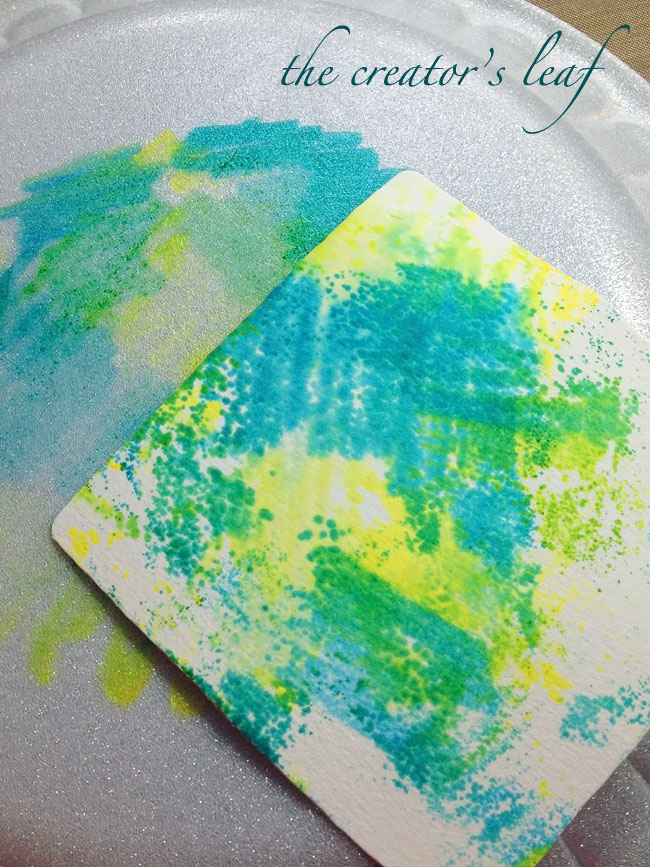
These are the ink sprays I used.
Next, I took some stencils I also got from Dylusions. I held this one in place and spritzed some water onto the page - through the stencil.
I let it sit for a couple seconds, then lifted the stencil. At this point my stencil was wet on the top side, so I turned it over and placed it face-down on the adjacent page.
I pressed it down, then lifted it and removed it. I let both pages sit with the water on them for about 30-45 seconds. The wetness of the water re-activated the ink and the color started lifting everywhere the water was. After that 30-45 seconds, I dabbed the wetness with the paper towel, and dried my page with a heat gun. This technique is called 'ghosting.'
I loved the pages just like this, but still wanted to add to them.
I inked a stamp with Stayz-On ink and
stamped it onto my pages in two different spots.
This was the end result. I will probably do more work on this, and at the absolute least I will tangle on these pages.
My second set of pages started off like this.
I applied the ghosting technique with some steampunk elements.
I really love this set also! I know that I will add more to these pages tomorrow. I will have to show you more photos when I get them complete. Now, off to tangle on the pink pages! I can't wait to see how they turn out!
I've been wanting to play with paints lately and today was the day!
These are the two final results. I know I still want to do a lot with these two-page spreads, but I'm still contemplating exactly what. Easy-peasy and literally about 10 minutes per spread. Here is what I did.
I started with Dylusions' Creative Journal by Dyan Reaveley. It's a large 11 13/16" x 9" journal, with pages measuring 11 3/8" x 8 1/4". The pages are heavy duty cardstock that hold up to lots and lots of water. I spritzed some water onto my paper, then I sprayed a bit of vibrant turquoise Dylusions Ink Spray onto the wet page.
To make this spread I literally used three colors. As they spread and mix, they make other colors. In addition to the turquoise, I sprayed on some Bubblegum Pink . . .
. . . and Lemon Zest. Then I spritzed more water onto the page . . .
. . . and closed the book. I pressed down the pages with the book closed, then opened it back up again. At this point I had wet, gloppy color on both pages.
I used a wad of paper towels to blot up the water. I added bits of color in the blank spaces, and
ended up with beautiful, bright colors.
These are the ink sprays I used.
Next, I took some stencils I also got from Dylusions. I held this one in place and spritzed some water onto the page - through the stencil.
I let it sit for a couple seconds, then lifted the stencil. At this point my stencil was wet on the top side, so I turned it over and placed it face-down on the adjacent page.
I pressed it down, then lifted it and removed it. I let both pages sit with the water on them for about 30-45 seconds. The wetness of the water re-activated the ink and the color started lifting everywhere the water was. After that 30-45 seconds, I dabbed the wetness with the paper towel, and dried my page with a heat gun. This technique is called 'ghosting.'
I loved the pages just like this, but still wanted to add to them.
I inked a stamp with Stayz-On ink and
stamped it onto my pages in two different spots.
This was the end result. I will probably do more work on this, and at the absolute least I will tangle on these pages.
My second set of pages started off like this.
I applied the ghosting technique with some steampunk elements.
I really love this set also! I know that I will add more to these pages tomorrow. I will have to show you more photos when I get them complete. Now, off to tangle on the pink pages! I can't wait to see how they turn out!
 A tile I put together yesterday. If you follow my blog, or my facebook page The Creator's Leaf, you will have noticed that I've been doing a bit of creative work with paints and ink sprays lately. This particular tile started off looking like this:
I am having a lot of fun making these different tile. A couple people sent me messages to ask if I would actually be able to tangle on these tile. They were concerned that the paints, or inks, might be too dark and that you wouldn't be able to see the drawings. As you can see in the first photo, that is not the case. The tangles actually show up quite well. The final colors in the tile were actually darker than what you see in this shot just above - I wasn't completed with it when this photo was taken. Once the tile are completely dried, they are ready for you to tangle any design your heart desires!
A tile I put together yesterday. If you follow my blog, or my facebook page The Creator's Leaf, you will have noticed that I've been doing a bit of creative work with paints and ink sprays lately. This particular tile started off looking like this:
I am having a lot of fun making these different tile. A couple people sent me messages to ask if I would actually be able to tangle on these tile. They were concerned that the paints, or inks, might be too dark and that you wouldn't be able to see the drawings. As you can see in the first photo, that is not the case. The tangles actually show up quite well. The final colors in the tile were actually darker than what you see in this shot just above - I wasn't completed with it when this photo was taken. Once the tile are completely dried, they are ready for you to tangle any design your heart desires!
Here is a link to the post where I showed step-by-step directons for how to make these tile. You really should give it a try! You know you want to!
 This week in the Artist's Play Room, our challenge was to try out something we had been wanting to do! Recently on the CZT facebook page, I watched a youtube video about using kosher salt on a watercolor wash as a different technique. I watched several videos on this technique and everyone said you really needed to use kosher salt, that it just worked better. So, off to Wal-Mart I went. This afternoon I took a 5"x7" piece of watercolor paper, covered it in a generous layer of water, and started moving some color around. For this project I used a basic kids watercolor set from Michael's to push some color. I let it blend and run and start to set up, then sprinkled some kosher salt in a couple areas. I didn't cover the whole piece so that I could see the effects of the salt.

Not sure why, but as it dried the colors softened up. The picture above was taken after the piece had dried and I had brushed off the excess salt. I like the edges of color lines - I'm guessing they were caused by a reaction with the salt.
And because I'm such a messy painter, I had paint on the backside as well. Which works out fine because I can use this as a two-sided page in an art journal.
Here is the youtube video I watched to learn this technique. I did not paint my page in the bathroom, however.
I learned this technique on Pinterest. Pinterest is a great place to learn a hobby! That's where I learned about art journaling, and where I first heard of 'zentangle.' This blog began as a result of what I learned on pinterest. Anyway, here I took three different colored sharpies and scribbled them on the back of a styrofoam plate. I was supposed to use something hard plastic - non-porous. This worked alright, but something hard plastic would have worked better.
Next, I sprayed the color with a little rubbing alcohol which caused the color to bleed and blend a bit. Then I turned a zentangle tile over and laid it in the wet color, which allowed the tile to soak in the color.
I was able to color two tile with that little bit of sharpie. If you don't want to use sharpies, you can also use copics or alcohol inks. I expect they would probably work better - I just couldn't remember where I stashed my alcohol inks the last time I got "organized."
I tried at least three more watercolor/paint/ink techniques which I would like to share with you, but it is 1:00 AM now and I should really go to sleep. I need to get up early tomorrow to go have my hair re-pinked! Yay!!!!
Head on over to Jenn's page - Just Add Water Silly - which is where the Artist's Play Room is hosted. Check out all the blog posts and maybe even share one of your own!