Showing posts with label rain. Show all posts

Thursday, October 15, 2015

Thursday String Idea #12

 Welcome to Thursday String Idea!
This week we have a stacked straight-line string
that can be filled with both straight and round tangles.
The string is all ready to print at the official 3.5" square tile size 
just by clicking here
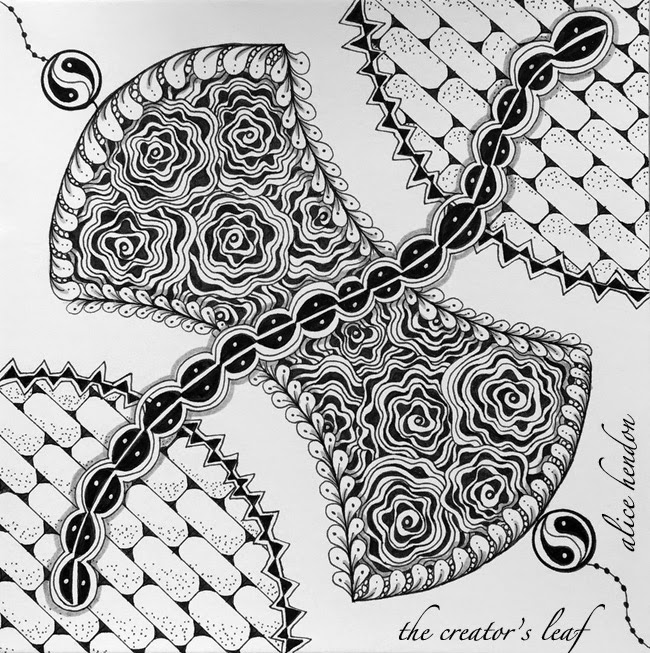
For my tile, I wanted to incorporate both types of tangles.
I started with the longer dividing lines and 
filled those with TootsieMoon, rain, coaster, 
and folie-form.
Then I started filling in the other spaces with
printemps, ahh, flux, shattuck, and portholes. 
Quick to tangle, this little stack was complete.

Won't you try out the string this week?
Here is a link to print. 

The Creator's Leaf

Monday, March 30, 2015

Test Driving My Wall Book

 My friend Jane gave our art journal group the challenge of stacking.
Stacking tangles,
stacking text,
stacking text and tangles,
stacking colors with any of the above.

Jane showed some examples of stacking,
and in a couple pictures she showed drawings she had made in her wall book.
I thought, I have a wall book that I rarely use.
So I pulled it out and tangled the stacks you see above
 in the page on the right.
It started out as a blank brick wall. 
(This is an actual two-page spread in the book.)
 I started at the bottom and worked my way up.
I love the way it turned out.
Looks like that art could be real graffiti.
(Fourth tangle up from the bottom,
is one I made up for this page.
I'm calling it Box It Up.
I'll post step-outs for it in tomorrow's post.)

In case you wondered, and even if you didn't, hahaha!
from the bottom up, the tangles are:
shattuck, copada, curlz (one I came up with at CZT training,) 
box it up, variation of crescent moon, flying geese, rain
curvy variation of shattuck, twing, laced, and footlites.
Here is the wall book, which I have been calling by the 
wrong name for the past couple weeks! 
I got mine at Amazon,
(I mean, really, is there any where else?)
Walls Notebook by Sherwood Forlee.
 I enjoyed that stacking stuff so much I decided to do a second page. 
I decided to go with graffiti circles and tangles that draw the eye to that post rising from top to bottom of the page.
And here is the completed page. 

Tangles from bottom to top:
shattuck (yes, I love this one,) puf, shattuck 
(see what I mean?), rain, box it up, and flying geese again.

And remember, anywhere you see pink words, that means it's a link. 
Click on it and you will be taken to step-outs for that tangle.
Cause pink = link.
In every picture I draw, I include my chop.
My signature.
At least I try to.
You see it just under this post.
My initials with the leaf - for The Creator's Leaf.
I don't always date the drawing - on the drawing itself - it's usually on the back.
For this page, though, I included it on the front.
Can you find it? And my chop?
(It's kind of obvious.)

P.S. ~ time for you to try out this whole stacking thing.
No rules, except you pile it up.
Words, tangles, colors, elements.
Whatever media you want to use.
It's stacking time!

Tuesday, March 17, 2015

Trying to Get Back in the Routine

Wow! It's been twelve days since I posted.
And, yes, I realize my blog looks weird.
Having a bit of an issue with photobucket,
hopefully Cindy will be able to figure it out soon.

I had a wonderful trip to Colorado, and the great news is
I did not have an issue with the altitude.
The medicine the doctor put me on worked!
Hallelujah!
I was pretty groggy the first several days,
but eventually I was able to do a little tangling.
This is the biggest project I worked on.
A little flux, rock n'roll, rain, beadlines, cruffle,
TootsieMoon and blox.
A fun piece to draw!

I'm working in the studio -
re-organizing - again.
One of the CZTs started a facebook group
for studios and it has started a desire
to re-organize.
Stay tuned in a couple weeks for new studio shots.

Wednesday, August 20, 2014

Stringing Along With TootsieMoon

Each week at Tangle Patterns - Linda Farmer posts a string for us to try out. I have saved every string since Linda started this. I organize them in a desktop folder according to year. A little anal-retentive much? (That's a hold-over term from my police days. Sorry.) The most recent string - #118 - comes from Barbara Finwall. This is what Linda gave us:
For tangles I used rain - a stand-by favorite of mine lately. That is what you see in that top wavy line. In the bottom section I used a tangle of my own - called TootsieMoon. You can see the steps in this post. TootsieMoon and rain work very well together, as they are similar in appearance. The steps are a bit more complicated for TootsieMoon, but so worth the effort! Thanks for the awesome string!

The Creator's Leaf

Saturday, June 14, 2014

Let Me Show You The Steps

People laugh when I tell them I can't draw, but seriously - I can't! What I can do is take something one step at a time, and keep adding and building on it until I am finished. Let me show you what I mean.
Let's draw this tile. This is my completed project and is was easy peasy to do. (Is that how you spell that? I always think about English peas in a can and just add a 'y' to it, but that doesn't mean it's right.)
Anyway, let's draw! I began with a 3 1/2" square piece of paper. In the tangle/zentangle world we call this a tile. (And I am going to go ahead and apologize for the angle of these pictures. I took these on a night when I was once again having achilles tendonitis issues and was sitting on a chaise lounge icing my ankle. Thus the angle. Sorry.)

So. Take your tile and a pen (I use a Sharpie fine point) and draw a random squiggly line across a good portion of the tile. This is the line you will build your drawing from. 
Then start at one end of the line and draw a running zig-zag line from one end to the other, crossing back and forth over your original line. This tangle - or pattern - is called rain. It is one of the official zentangle patterns. Your zig-zag does not need to be evenly sized, so don't worry about that!
Now use your pen to fill in all those lovely little triangles with ink. You will have a curvy rope of blackened triangles when you are done.
(One little trick to remember - and it will make a world of difference - is to turn your tile as you draw. If it is easier to draw with the tile turned in a particular direction - turn it. I find myself rotating mine all the time to make it easier.) Next I want you to mimic the triangles with a running line that lightly borders it. This is called an aura - which is defined as  an emanation surrounding something. I try to do mine about 1/4" from whatever I am auraing. (Say that 20 times fast - auraing, auraing, auraing, auraing, I can't even type it fast!) Draw your aura along one side of the triangles, then turn your tile and draw an aura along the opposite side of the triangles.
Now I want you to aura the whole thing. One looping aura on each side of the rain line and zig-zags. Then I went back inside the four inner loops and made another little aura in those. You may or may not have these loops - depending on how big you drew your line originally. 
Inside those four loops, I drew a tangle I designed and named matahari. There is a bit more to it, but I just used part of it for this drawing. Start at the top of one of the loops, make a rounded v-shape down into the loop, and add a little tiny tear drop - like water dripping off - under it. 
Next, thicken up those outside lines. You can either do this with a wider pen/marker - or you can draw another line close to your outer auras and fill it in with black. Whatever is easiest with the pens you have. I just loped it across the top and under the bottom. I think this is called thickening your lines, but I'm not absolutely positive. (This is my blog, so I guess I can call it anything I want to. Right? Hehehehe!)
Along the outer edge of those thickened black lines, add a line of little black humps - try to space them somewhat evenly. This is beginning of another official tangle called crescent moon.
The next step in crescent moon involves more auraing - yay!!! you should have that auraing thing down by now. So, I want you to aura two lines around those crescent moon shapes along both sides of your drawing. Remember - turn your tile as often as you need to.
(And can you believe it? You are almost done!)
Next, I took a white gelly roll pen and made a little tiny circle in the center of every one of those crescent moon hump shapes. It just adds a nice highlight. If you don't have a gelly roll pen, a white pencil may also work. (Or you could leave that part out and come back to it after you make a trip to Michael's to buy a white gelly roll pen. Hahaha! I know you want to!)
I have a clear glittery gelly roll pen that I used to fill in the outer auras. This is not a necessary step, but one I enjoy using a lot!
Your drawing is now complete. To give it some depth, some 3-D'ness if you will, take a pencil and light shade a line along the inside of those large auras. I just use the side of a regular pencil - along with a light touch! Then you can smudge that line with the tip of your pinkie finger. This little bit of shading will make a world of difference in your finished drawing. It makes those curves recede and gives more dimension to your art. You now have a finished piece of art that you can be proud of! (And if anyone cares - we used three tangle patterns in total.)

There are lots of tangle patterns! I mean loads and loads! There are a couple places you can find them if you want to try your hand at some more drawing. I have a bunch of pinterest boards here that show the steps to hundreds of tangle patterns, as well as boards showing completed tangle art. You can also find patterns online at Tangle Patterns here.  New ones show up there all the time. Now, go have some fun! You'll be glad you did! And congratulations on that awesome piece of art you created!

Saturday, October 19, 2013

Trying to Find the Groove

Yesterday I showed you the start of this 11" x 14" piece I'm working on. This is destined to be cut down into fifteen separate ATCs for a swap I am participating in. In this one view you can see three brand new tangles - merryweather, stella, and crezn't. These pink links will take you to step-outs for two of those. Stella hasn't been released (I don't think). It is the pretty poinsettia looking flower in the center. 
This bold band across the middle is something I made up. I was trying to draw Caren Mlot's new tangle spokes and got lost in the first two steps. It isn't a hard tangle, I just wasn't paying attention. So I just kept drawing and that dark band from lower left to upper right is what I came up with. You can also see some printemps, Sandy Hunter's cruffle, cirquital, Sandy Bartholomew's msst, Jane MacKugler's henna drum, knase, and a few random other tangles. 
In this photo you see more of merryweather and crezn't. The fan shaped tangle near the top right is called S Wich Blade and it's by Carol Ottaway. She's an awesome artist, you should check out her blog here.  That dark wavy line and circle tangle is beanpodz from Neil Burley. A little footlites, more stella, a little munchin, and a variation of rain
I hope to finish this up today.  Still having some issues today with creativity, but trying to push through. Trying to find my groove once more. Thank you to everyone who sent me warm wishes and encouraging words, and thank you to those who offered to pray for me. You are loved and appreciated!

The Creator's Leaf

Saturday, August 3, 2013

Never QUIT!

If we are honest with ourselves, I expect a great many of us struggle with self doubt. Struggle with the question, am I any good, do I really have any talent at all?  I know as I am constantly trying new art techniques, new methods, new product, I frequently wonder if I have any talent at all, or am I just playing at making art. I have recently figured out (but often forget) that it doesn't matter if I really have any talent, any artful inclinations, as long as I am creating something - I am happy. And that's what really counts. 

Today I was reading through emails, and I came across my daily post from Cloth, Paper, Scissors. I have to tell you that most of the time I just look at the pictures and only read the article if there is a photo that interests me. Today I started reading a story about a lady who wrote in asking, "how do you know if your art sucks so bad you should just give up?" Then the editor/story writer pulled out some comments from various readers, and one really stood out in my mind. I guess because it's the way I would respond. I don't tend to be all wordy, and proficient at big words (this is one of the longest posts I've ever written), and heartfelt sentiments. So I loved that the reader simply said, "Never QUIT! Avenge the naysayers!" And I totally agree! Let's go do some avenging.

The Creator's Leaf

Monday, December 31, 2012

New Years Eve, 2012

The year 2012 is almost complete. It is almost history, done, over, out of there, kaput. You get the picture. Much has happened this past year. As far as my blog goes - it's quite obvious that photography has taken a back seat as I focus on artwork and make strides to learn some new skills. I began my art journey in April - by studying/stalking pinterest boards dedicated to art journaling. One thing led to another and before I knew it I was flying to Rhode Island to train and get certified to teach Zentangle®. I still click a photo here and there, but these days the pics are typically taken with my cell phone.
Our family continues to grow as Jason and Bobbie will be welcoming a daughter into the world in about four months. Nicole and Dale have expanded their family to a total of six children between them - two boys, four girls - yay for girls! Kali is now in a courting relationship with Joshua (scroll down to post titled The Perfect Christmas Gift). She is making plans to head to Maryland in May to attend L'Academie de Cuisine and gain certification as a professional pastry chef. Mark and I are still trudging along - paying bills and making it day by day. Thankful is what we are! Thankful for our wonderful family and thankful for another year. Thankful for God's blessings and thankful for each other. As we ring in 2013, let's remember all the little things that add up to one great big blessing. And be thankful.
The Creator's Leaf

Saturday, December 29, 2012

More Christmas Tangles

Christmas. A week in the mountains. It rained every day except one. That day we rushed and drove around to see as much as we could see, then it was back to rain the next day. So, what do you do with six days of rain? You draw. A lot. So, here is another tile. More practice with diva dance, tearse, cadent, rain, tipple, and a couple other tangles that I can not recall the names of right now. I'll work on that and fix this post. Soon. Promise.

The Creator's Leaf

Wednesday, September 26, 2012

Just a Little Practice

When I went to the CZT training last month, Maria and Rick gave each of us a wonderful bound journal to take notes in. Maria refers to these as field journals. I wish I had understood a little better how we would want to keep these and use them and refer back to them over and over and over. I would have written more legibly. I would have been more precise and deliberate with my sketches. Since I've been home I have taken time to work on some tangles in my journal, some that I had been having problems with. Here you can see that I traced a tile twice and worked on several patterns. I think I will continue this - as a quick reference/refresher - and continue labeling as I go. Just a little something I worked on a couple days ago. Where do you keep your notes? How do you recall the patterns and what they look like? If you are traveling and don't have easy access to the internet and Linda's tanglepatterns.com, this might be one answer.

The Creator's Leaf

Thursday, August 23, 2012

It's a Celtic Challenge

Judy from Creative Doodling offered us a challenge - a celtic knot challenge! A freestyle celtic knot challenge. You can see the link to her instructions here
Step One was to draw your string - draw one at random, with no specific directions other than to have it connect together at the two ends of the string.
Step Two was to draw the contours inside the shapes created by your string.
Step Three was to aura the outside of the entire shape. Apparently I forgot to take a photo of the next step. Step Four was to connect the lines at the gaps, creating over and under sections. (I opted to round some of the corners to smooth out some less than perfect lines.)
Step Five was to rub out your pencil line and tangle/doodle in the sections. This was the fun part! I tried some new patterns and some old.
Next I started adding some onamato in the string.
Completed the onamato with a row of perfs around the outside.
Then I shaded. I was happy with my celtic knot at this point. But, you know how I am. Everything is better with color - even if only a little pop of color!
And so I added a little color with my copics. This was a really fun - and easy - challenge to complete. Judy has just posted challenge number 2! If you want to participate this week, click here to get the instructions. I am going to go check it out now and get an earlier start this week!
The Creator's Leaf