Showing posts with label dandelion. Show all posts

Tuesday, August 25, 2015

Narwal and Bublz

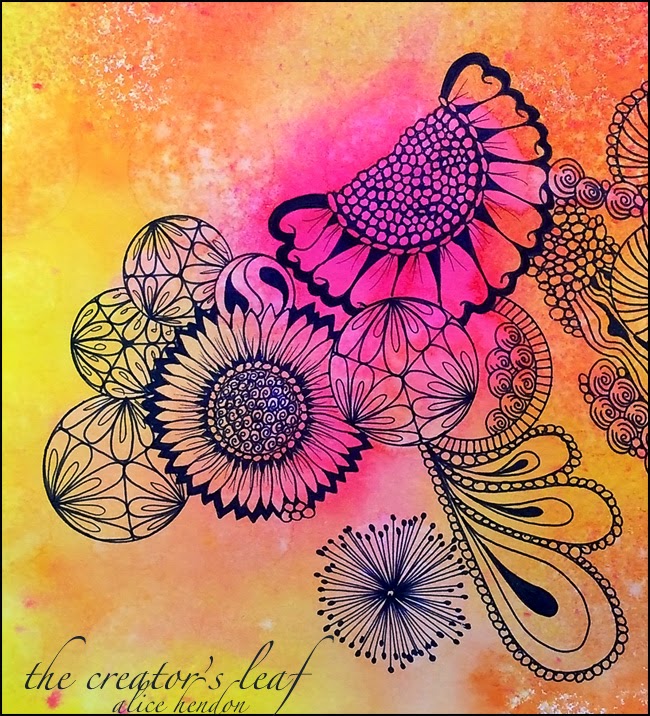
What a fun piece to make!
The color comes from Brushos Crystals,
you literally sprinkle them onto wet paper
and watch them work.
No science, no thought process,
just water wash the paper and sprinkle.

After the beautiful color is completely dry,
tangle with your favorite pen.
My current pen of preference is the Sharpie Fine Point.

Tangles in this beauty include:
bubble wrap,
bublz,
dandelion,
O'Cee, and
narwal.

If you would like to see a great video showing you how to draw narwal, 
check out Helen Williams' video at this link.
This video really defined to me the way narwal should be tangled.
Have fun!


The Creator's Leaf

Friday, July 24, 2015

Scrap Tangling


I love my Dylusions Ink Sprays.
I use them all the time.
I love lots of bright, wonderful, vivid color.
Can you tell?
 And I never throw any of it away.
Seriously.
I have scraps that are 1" x 3".
Occasionally I will pick up a scrap 
and start tangling on it.
I try to tangle within the color.
Find a patch of color and start there,
then just go with whatever direction
it takes me in. 
My heart tells me when it is finished.
And this piece?
Is finished.
No up or down,
no right way for it to be positioned.
Just lots of yummy, colorful, tangled up fun!

The Creator's Leaf

Wednesday, July 1, 2015

A Little Brusho Under the Sea

I love my brushos!
They give great, vivid color every time.
This was a 5" x 7" scrap with some brushos left
over from another project.
Don't ever throw out your scraps!
I just tangled up a little undersea adventure and fun!
I loved the way this turned out!

Thursday, April 9, 2015

Tangling the Opus

Recently the Zentangle® company released a 10 1/2" tangling tile called the Opus.
I've drawn on a couple with great results.
This time I thought I'd combine the Opus with my
first tangling/journaling love - Dylusions Ink Sprays.
 Typically I wouldn't leave the curled edges in the photo,
I would crop them out before I posted.
I thought it was worth showing you the little amount of curl I got 
for a whole lot of wet media.
 I began by using a mop brush and slopping a whole lot of water 
across the entire page.
Then I used lemon zest, fresh lime, and calypso teal
and sprayed on some beautiful color.
I spritzed a little more water just to be sure.

You see those circular places?
Those are super easy to make.
Wherever you have a good puddle of water,
point your heat gun straight down into the puddle
and watch it push the color out to the sides.
Let it dry that way and you have instant cool circles.
 I use those circle areas to make designs like this one.
I just follow the lines.
And while I'm thinking about it let me say this -
the slight curling you saw in that second photo from all the wet media -
once the opus dried it flattened itself back out.
Completely.
 I just kept tangling, following the lines of color.
 Building section by section.
 I saw someone else drawing their squid tangles in a similar manner. 
I liked it so much I tried it out. 
This is how mine turned out. 
I tried to make it look like they were swimming.
And here is my completed Opus tile.
I love the way it turned out!

Just follow the flow of the color.
Go on, you know you want to try it!

Thursday, February 19, 2015

Garlic and Joey

I've been playing with this shape a lot lately.
(I'm so cold I'm having trouble typing.
Back space, correct, go forward, repeat.)
Playing with different ways to fill this shape -
that totally looks like a bulb of garlic to me,
for some reason.
That background is a 5" x 7" pull from a gelli plate.
Joey's Challenge this week was called 
The Polka Dot Tangle.
Randomly drawn circles, 
each filled with a different tangle.
It's really good practice for quick tangles.
For this 5" x 7" piece, I used my new 
Prima Color Bloom Spray Mists.
I've used them before and my pens worked great over the color, but for some reason this time
my pens did not work so great. 
I used a sharpie fine point and had
trouble filling in the dark areas.
I tried shading, but the color wouldn't hold
the graphite. So. Here it is.
Unshaded but that's ok.
To participate in Joey's Challenge,
just go here and check it out. 

Saturday, December 27, 2014

Pink and Blue Swirls

This project was begun a couple months ago.
This is the end result.
Ta-da!!!!
It began like this.
I used a 9" X 12" sheet of Canson watercolor paper,
plenty of water in a spray bottle,
and Dylusions Ink Sprays - 
bubblegum pink and london blue.
I love the colors I can get with the Dylusions - so much fun!
Some of those round places - like the blue one just below the center -
was made by holding a heat gun straight down
above a wet puddle of color - 
until it dried.
Here is a link to my tutorial on using Dylusions.
This is the same blob of color - tangled.
Look how I divided up the sections and drew patterns on them.
That's what I did with the whole sheet.
Wherever I felt tangling needed to happen - it did.
This section is on the right, about halfway up.
This section is towards the middle,
but for the life of me I can't tell if this photo is
turned the wrong direction or not.
Just keep tangling and pretty soon 
you will turn this . . .
. . . into this.
I promise!
If I can do it - you can, too.
All you have to do is start.
And if you don't have Dylusions - 
I started with a simple watercolor pan set
from the school supply row in Wal-Mart.
They make some pretty beautiful artwork, too!

Saturday, May 31, 2014

Sunset Colors

I have been crazy busy lately. I'm trying to finish up some edits on senior photos for friends, I just wrapped up artwork for another book submission, and I recently found a wonderful group on Facebook dedicated to the navy base in Argentia, Newfoundland where I grew up. I have been having a blast looking at old yearbooks, posting an old yearbook - literally, searching the house for photos and mementos, reading everyone's posts and looking at pictures. So much fun! And now I seriously want to go visit the place where I grew up. But until then . . . still working on art for books. What you see above is a cut off/trash portion of one of the pieces. I can not post the work I submitted, but I can show you the trash/leftovers. Ta-da!!! I never throw anything away, I will finish this section up and post a completed version soon. Carolyn Boettner described my color preferences as sunset colors. I guess she's right :).

The Creator's Leaf

Thursday, November 28, 2013

Love These Colors!

This has been keeping me busy over the past couple days. A few posts back, I showed you some backgrounds I've been working on. This is the first one I've tangled up. Here are some detail shots:
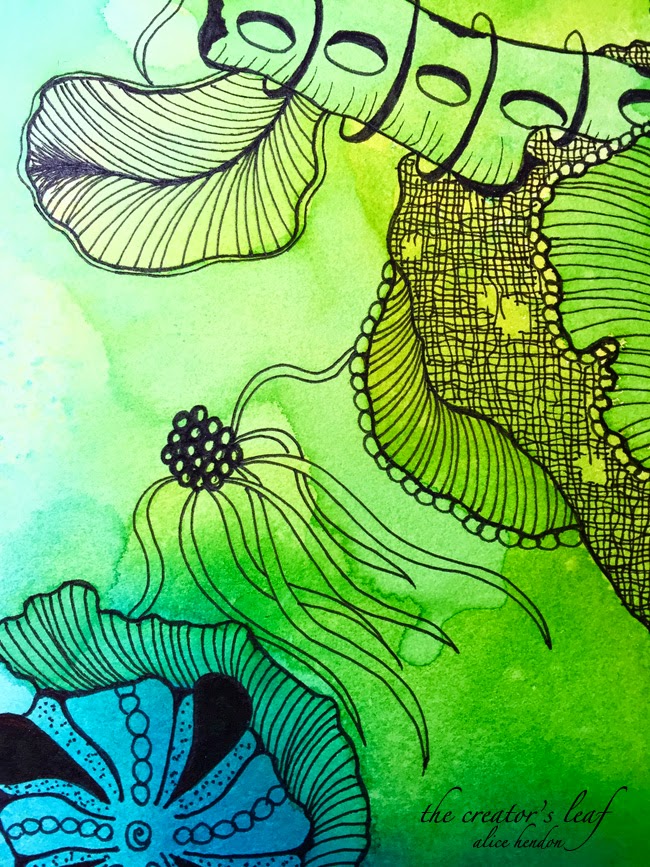
I love this tangle of Sandra Strait's called Urchin. That's exactly what it looks like. I added that ruffle around the outside and tried to make it look like it's flowing in the water.
I was hoping these little pipe-thingies could represent some coral.
And I had to incorporate some of Michele Beauchamp's new tangle mak-rah-mee.
I really like the way mak-rah-mee flows.
These tangles just work so well together, and I love the colors! Time to move on to another background now and get busy!

May you and your family have a blessed Thanksgiving!

The Creator's Leaf

Friday, July 5, 2013

Monochromatic, APR #64

The Artist's Play Room challenge this week was monochromatics. Any color - our choice - in variations from light to dark. This is what I made today.
I haven't done a tutorial in awhile, so here are the steps I followed to make my monochromatic offering this week. I started out with a sheet of 9" x 12" Strathmore Bristol smooth surface, 100 lb. paper. I also used Dylusions Ink Sprays in Funky Fuchsia, Bubblegum Pink, and a mix of White Linen with 8 drops of Bubblegum Pink. 
To get started, I took a Ranger spritz water bottle and misted the paper lightly.
While the water was still damp, I spritzed the three colors of ink spray onto various sections of the paper. To get the feathered effect I got with the pink section to the right, I held my ink spray bottle to the side of the paper and spritzed it across the paper instead of straight on to the paper. As the ink hit the page, it feathered and spread in the water. 
Let the ink sit in the water for 10-15 seconds, and you will notice the colors start to blend and spread. 
You can keep adding color as you need to. If you have white spaces that could use a little help, spritz more water onto those white areas and watch the colors start to spread even more.
If you get too much water buildup, roll a section of paper towels back and forth across your page. This will blot up excess water and color. It may also lay down some awesome texture, depending on what your paper towels look it.
Here is a closeup of some of the details.
Keep working the water, ink, and paper towels until you get the effect you want.
More detail. If you want to hurry up the drying process, feel free to use a heat gun.
Wanting to incorporate other elements into my monochromatic theme, I used some stencils from Joggles.com, a couple daubers, and some Memento ink pads. I placed the stencil where I wanted it to be on my layout, held it in place with my hand, and then dabbed stamp pad ink (rose bud) onto the stencil flowers.
I wanted my flowers to have some depth, so I used a wild plum Memento ink pad and a smaller dauber, dabbing darker ink around the lower portions of the petals. I used another Joggles stencil to make the sun.
Once I got my inks the way I wanted them, I heat set them with a heat gun. I don't know that this is absolutely necessary, but I am used to doing it.
Next I used this cool little supply that came in the mail last week. Punchanella, I got it from the Paper Studio. It is the remnant leftovers from sequins. Pretty awesome! I laid it in place across a lower corner and used the wild plum ink to dab some wonderful dots across my page.
I love the way it looks! And it is so easy to do!
This is what I had up to this point.
I also used a stamp at the lower left corner to add a sentiment. Adding linework was a lot of fun! Patterns I used included: grass border, tidal, leau, printemps, phicops, mooka, fescu, and dandelions. I added a few butterflies via stamps and was done. I love the bright colors! This was so easy, anyone could make it. You don't have to use the ink sprays if you don't already own them. (Although, if you ever try them you won't want to use any other ink.) Ranger color wash sprays would work and most Michael's carry them. You could do something similar with watercolors also. 

If you have a minute, head on over to Jenn McLean's page Just Add Water, Silly and check out everyone's artwork for this week's challenge. You could even add some of your own!
just add water silly's blog hop link
The Creator's Leaf