Showing posts with label twinkling h2o's. Show all posts

Thursday, September 28, 2017

Underwater World

So I'm coming across these pieces of art I drew
for a book I don't believe will ever be published,
and I thought - "wow! blog art already done! √"
And here you go.

I started with the background which I made
with Twinkling H2Os, lots of water, and salt.
After it was totally dry, I scraped off the excess
salt and began tangling with a variety of pens.
Mostly a copic multiliner and a Sharpie fine point.
White highlights are courtesy of a gel pen,
a zenstone, and a white chalk pencil. 

Tangles I used are:
folie-form, mooka, quabog and gellin'.

In case you are new to my blog,
pink = link.
(Except for here.)

Friday, October 23, 2015

Bringing Back the Free-Hand Mandala

We spent a wonderful week in Maine.
You will be getting inundated with photos in the next post. 
It's only fair to warn you. Hahahaha!
 We had no internet, so I wasn't able to post.
AND, I need to post a new challenge on my
Facebook Group - Zentangle All Around
so I decided to bring back the
Free-Hand Mandalas.
 Two years ago I wrote several posts about the art of the
Free-Hand Mandala.
You can find those posts here, here, and here
The first link will give the steps to making one of these awesome artworks.
The other two links will give you more ideas to create your own.
This week's challenge is simple.
Create your own free-hand mandala and post it.
You may do it without the color if that scares you.
Hahaha! Me? I live for color!

Also, I want to let you know about a new Facebook group
affiliated with out Tangle It! Journal series.
(We have just finished up our 4th week being 
the #1 Hot New Release on Amazon.
Whoot! Whoot!)
The new Facebook group is called:
Tangle It! Mandala Club.
I am going to go over there right now and 
post one of these free-hand style mandalas.
I hope to see one of yours there soon,
and on my Zentangle All Around page as well.
Have a great artsy weekend!


The Creator's Leaf

Saturday, May 24, 2014

Underwater Steampunk?

Underwater steampunk? That was my husband's comment when he saw this piece in progress - that it looked like underwater steampunk. How did I come to this end result? So glad you asked.
I must apologize because I totally forgot to take a photo of the before page. Recently I came across an excellent sale on Twinkling H2Os and had to order several colors I didn't already have. Cause you know you have to do that when there is such an awesome sale! It's one of those unwritten art journaling rules. Anyhoo, when I unpacked my order, I pulled out my favorite Strathmore Watercolor Journal and tried out all the new colors.
Just in case you've not used H2Os before - let me give you a tip. Consider it a bonus in this post. About 10-15 minutes before you want to use the colors (or even longer if you can be patient) take the tops off the jars and spritz in some water. I use a pipette and put 3-4 drops of water into each pot. Then I have this lovely little bottle of Ox Gall liquid (don't even ask) from Holbein. I add 1-2 drops of ox gall into each pot. Then let them sit. The mica and the pigments have to have time to hydrate, otherwise you will only pick up color from the top of the pot. It will not have all those lovely little bits of mica which is really the part that makes the H2Os twinkle. The ox gall speeds along the process, enhances the flow of the H2Os, and just makes your painting all around more awesome!
Once my lovely little pots of bold, shiny color were hydrated I used a paintbrush to stir them up. When you have a wonderful thick syrupy goo the H2Os are good to go. I used a watercolor page to test the colors. This is what I used for the base to build my drawing on. As you can see I really had no design in mind, I just started laying in bits and pieces of tangles to flow with the colors. See how those coral pipes flow along the lines of the pink and red? And the printemps (clams?) fill in blocks of pink and yellow?
I truly had no end goal in mind. I just kept adding cool tangles until I felt like the drawing was finished. Someone commented recently that they struggled with leaving white space, with feeling like they had to fill in the entire area with design. Sometimes I do that like in this post (OK, disregard that statement, I haven't posted that picture yet. Oops!) and sometimes I just stop when it feels right.
Then I struggled with the same dilemma I always struggle with - do I shade and highlight? I genuinely liked the way the whole thing looked and think it would have been fine left as it was. I didn't know how shading and highlighting would work on the H2Os. They tend to give you a slick feel which makes surface grabbing kind of tough. I started with a graphite pencil for shading, but quickly gave that up for a pale grey Pitt pen. I used my white General Chalk pencil for some highlights, but when I smudged with my white tortillion the highlights all but wiped away. So most of the highlighting you see came from a white gelly roll pen. I do like the difference the shading and highlighting made - even though it was a stretch to make it work. 

* * * One important last note about the H2Os - and this is critical - don't put the lids back on until every bit of that lovely little paint is absolutely dry! If you put the lid on wet paint it will dry shut and you won't be able to open this jar again without breaking the lid. Not cool! I have this on good authority - not based on experience. * * *

Hahaha! Thank you for reading to the end of this crazy post. I loved making this piece of art! You know me - - - bright, vivid, and colorful are my middle names! Have I shown you my hair recently? Just re-blued last week - thank you, Brittany!!!
I am also going to use this for my Artist's Play Room post once Jenn sets up this week's link. Click below to see some amazing art!
just add water silly's blog hop link

The Creator's Leaf

Saturday, April 26, 2014

It's a Fanta-Sea World

Wow! It's really hard to blogpost from the iPad. This type looks huge. If it seems like I'm screaming at you - - - sorry. I don't mean to. 

I finally finished the underwater drawing we started in Melbourne, in Meredith Yuhas' class. Twinkling H2Os, some sea salt, microns, graphite, white charcoal, and a gelly roll pen. That's all it took to make this beautiful, underwater fantasy world. So much fun! 
The Creator's Leaf

Sunday, September 1, 2013

Fall is Almost Here

Fall is almost here, if you discount the fact that the high tomorrow in Florida is supposed to be 91 degrees. I will be glad when the high temps go away for awhile, even if it does only drop 5 degrees! For a girl who grew up in Newfoundland, where the average summer temp hovers around 61 degrees, these Florida temps of 90-102  in the summer are just killers. Add to that hurricane threats and wildfires, and you will see why I am excited about fall.
I made this two-sided bookmark for a swap my friend Sandy Hunter is hosting. The first picture, the front, features two of my own patterns - punkin' and blox. The back has ambler and avreal, two patterns I've not used before. I really like avreal - the one down the middle! Color is courtesy of my Koi watercolor set. Shimmer (if you can see it) is from my twinking H2Os. Shipping this off to the swap tomorrow. When I receive one back, I will post it here for you to admire :).
The Creator's Leaf

Friday, August 30, 2013

Shining Up Those Reds

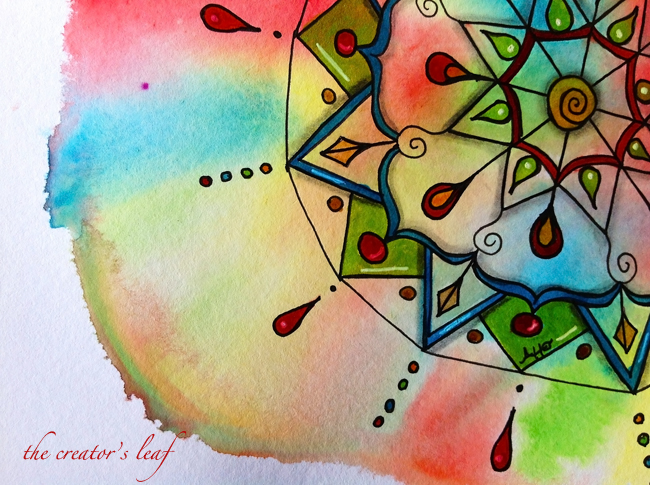
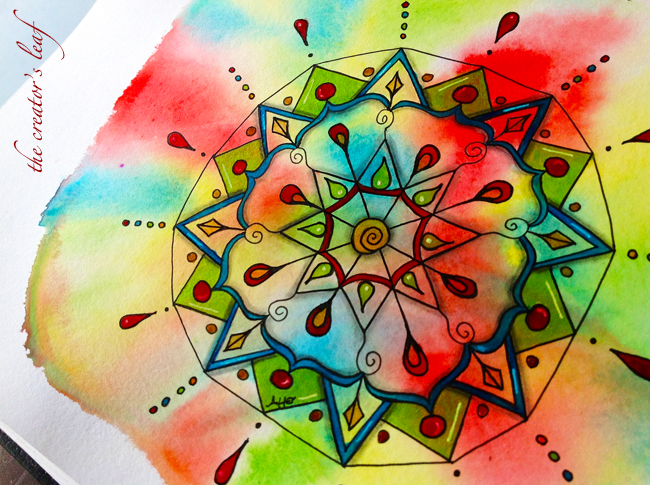
Yesterday I posted a tutorial on free-hand mandalas. Halfway through I realized I had not taken some critical photos, so I stopped everything and made the above background.
It looked just like the picture above - without the mandala drawn on it :). Then I went back and finished the post with photos of the other mandala. So, today I picked this back up and completed the project. With just a few simple lines and strokes, we have the basis of a new mandala.
The background colors were made with a Koi Water Colors Pocket Field Sketch Box from Sakura. Once I finished drawing the mandala, I used my twinkling H2Os to add the design color.
The H2O colors I used are: majestic blue, sky blue, key lime, poppy red, persimmon, mango mamba, pearl green, pearl red, Egyptian gold, and autumn butternut.
Can you see some of the shine starting to show? It's really hard to photograph and capture the essence of the twinks. I love these colors so much!
There's that ring around the edge where I tipped the sketchbook and let the water colors run and spread. Love it when that works!
To finish my mandala, I used a white gelly roll pen for highlights, and a pencil and tortillion for shading.
Voila! Finished project that includes red, a color I don't like and swore at copic training that I would never use again. Haha! I actually like it here! I hope you are able to try a free-hand mandala. They are so much fun and you never know what it is going to look like until you are finished. 

The Creator's Leaf

Wednesday, August 28, 2013

Just Enjoying the Day

I am just relaxing here in Maryland while Kali slaves away at work and at school. Hahaha! Seriously, I am. And she is. Working hard. Her. Not me. 
Kali is in a really busy part of life right now, learning and studying and working and doing homework and working some more and going to more classes and . . . well, you get the picture. Her life is a little overwhelming at this point. Mark and I were concerned about her taking care of herself during this particularly trying time, so I am visiting to make sure everything gets done - like eating, and sleeping. You know - important things like not getting sick. Cause 'ain't nobody got time for that!
While Kali's at school or work, I am drawing. A lot. And having fun. I have been able to get back involved in Dion Dior's Mastering Twinks series of classes and combined some of my new knowledge with the postcard swap. I know people have said this at least a thousand times, but I really do wish the cameras could pick up all the shine and glimmer these beautiful little pots of Twinkling H2Os bring to the palette. Such gorgeousness at my fingertips. I love it! This little postcard is winging its way to my friend Donna Hornsby, who I hope to maybe one day actually meet in person :). Enjoy, Donna.

Tomorrow I will outline a few basic steps for you to draw a lovely free-hand mandala. It really is very easy. I promise!
The Creator's Leaf

Monday, August 26, 2013

Butterfly in the Wind

Butterfly in the Wind

A child is . . . . . . . 

A butterfly in the wind
Some can fly higher than others,
but each one flies the best it can.
Why compare one against the other?

Each one is different!
Each one is special!
Each one is beautiful!

~ Author unknown ~
I have been trying like crazy to get back to my twinkling H2O lessons. I think everyone else has been finished with the class for a couple weeks and I have been having trouble getting it done because of traveling. I started this prismatic several weeks ago and just finished it last night. I've got a long ways to go till I am comfortable with the twinks, but like the poem says each one is different, special, and can be beautiful - we just need to open our eyes to recognize it. 
The Creator's Leaf

Friday, July 19, 2013

Shine, by the Newsboys

Shine
(lyrics by the Newsboys)

Shine.
Make 'em wonder what you've got,
make 'em wish that they were not
on the outside looking bored.
Shine.
Let it shine before all men.
Let 'em see good works, and then,
let 'em glorify the Lord.
When you let it shine,
you will inspire
the kind of entire turnaround
that would make a bouncer take ballet,
but out of the glare
with nowhere to turn
you ain't gonna learn it on "What's My Line?"
Shine.
Make 'em wonder what you've got,
make 'em wish that they were not
on the outside looking bored.
Shine.
Let it shine before all men.
Let 'em see good works, and then,
let 'em glorify the Lord.
Shine.

(Stillman & Birn Zeta Series Sketchbook, water colors, 
Twinkling H2Os, micron, uniball pen)
The Creator's Leaf

Sunday, September 30, 2012

One Last Project

I had one last project for this week. Twinkling H2O's. I got a bunch of new colors for my birthday and was just itching to try them out! I started by spritzing some water into the tubs to get the colors primed and ready.
I used an 8" x 10" piece of watercolor paper and wet the entire surface really well. Then I used my twinkling H2O's to lay down various colors with a brush. To get some pops of color, I dropped spots of color in random places. 
As I let the colors start bleeding, I started to see some feathering.
Not as much bleeding and mixing as I wanted, so I sprayed a layer of water across the entire page. This caused the intensity of the colors to soften.
As I let the paper sit for a few minutes, the colors started spreading out more, overlapping, blending and merging. 
To get the color pushing a little more, I spritzed this with some rubbing alcohol. As soon as it hit the colors, I started getting more spread patterns, more color, and more variation.
The alcohol kept the colors spreading and fanning out.
I love the intensity of the colors and the way they bleed together. Starting to pick up a little sparkle in this photo.
More detail of a different area.
And more. That right-hand corner didn't get hit with the rubbing alcohol and those colors blended in a different way.
It was a productive day. This is a shot of some of the supplies I used overall. Add in the twinkling H2O's, sharpies, a couple more tile and it was a good day! Now to decide what to do with all my projects!

The Creator's Leaf